A R3D tem o prazer de apresentar o PLA Ultra Glow, um filamento de impressão 3D de alta qualidade que brilha no escuro. Este filamento apresenta uma cor verde neon vibrante durante o dia e brilha no escuro após ser exposto à luz. Com o PLA Ultra Glow, os seus projetos terão um toque único e mágico.
O PLA Ultra Glow é um filamento de impressão 3D fácil de usar, feito com material biodegradável de alta qualidade. É compatível com a maioria das impressoras 3D no mercado e imprime com facilidade. Após ser exposto à luz, o filamento brilha no escuro, produzindo um efeito surpreendente.
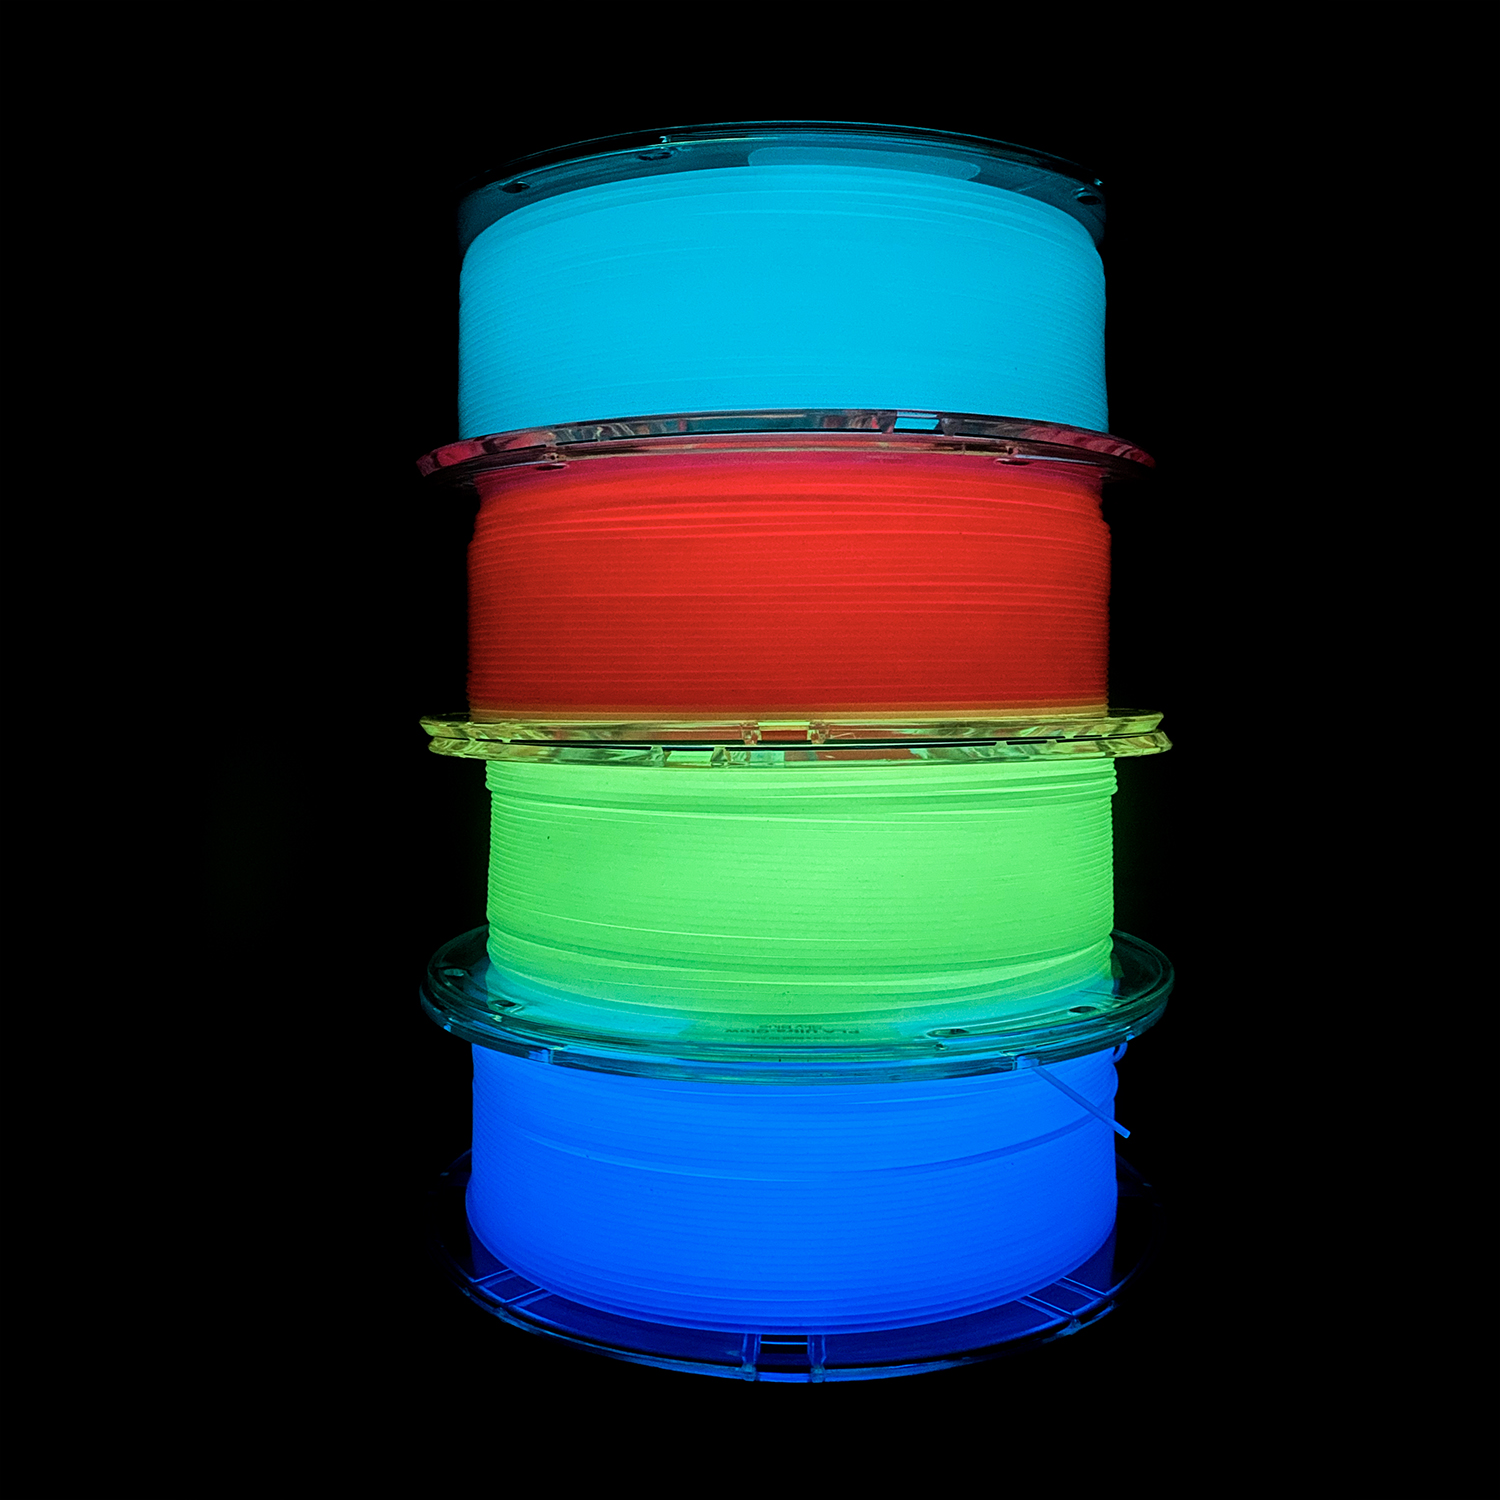
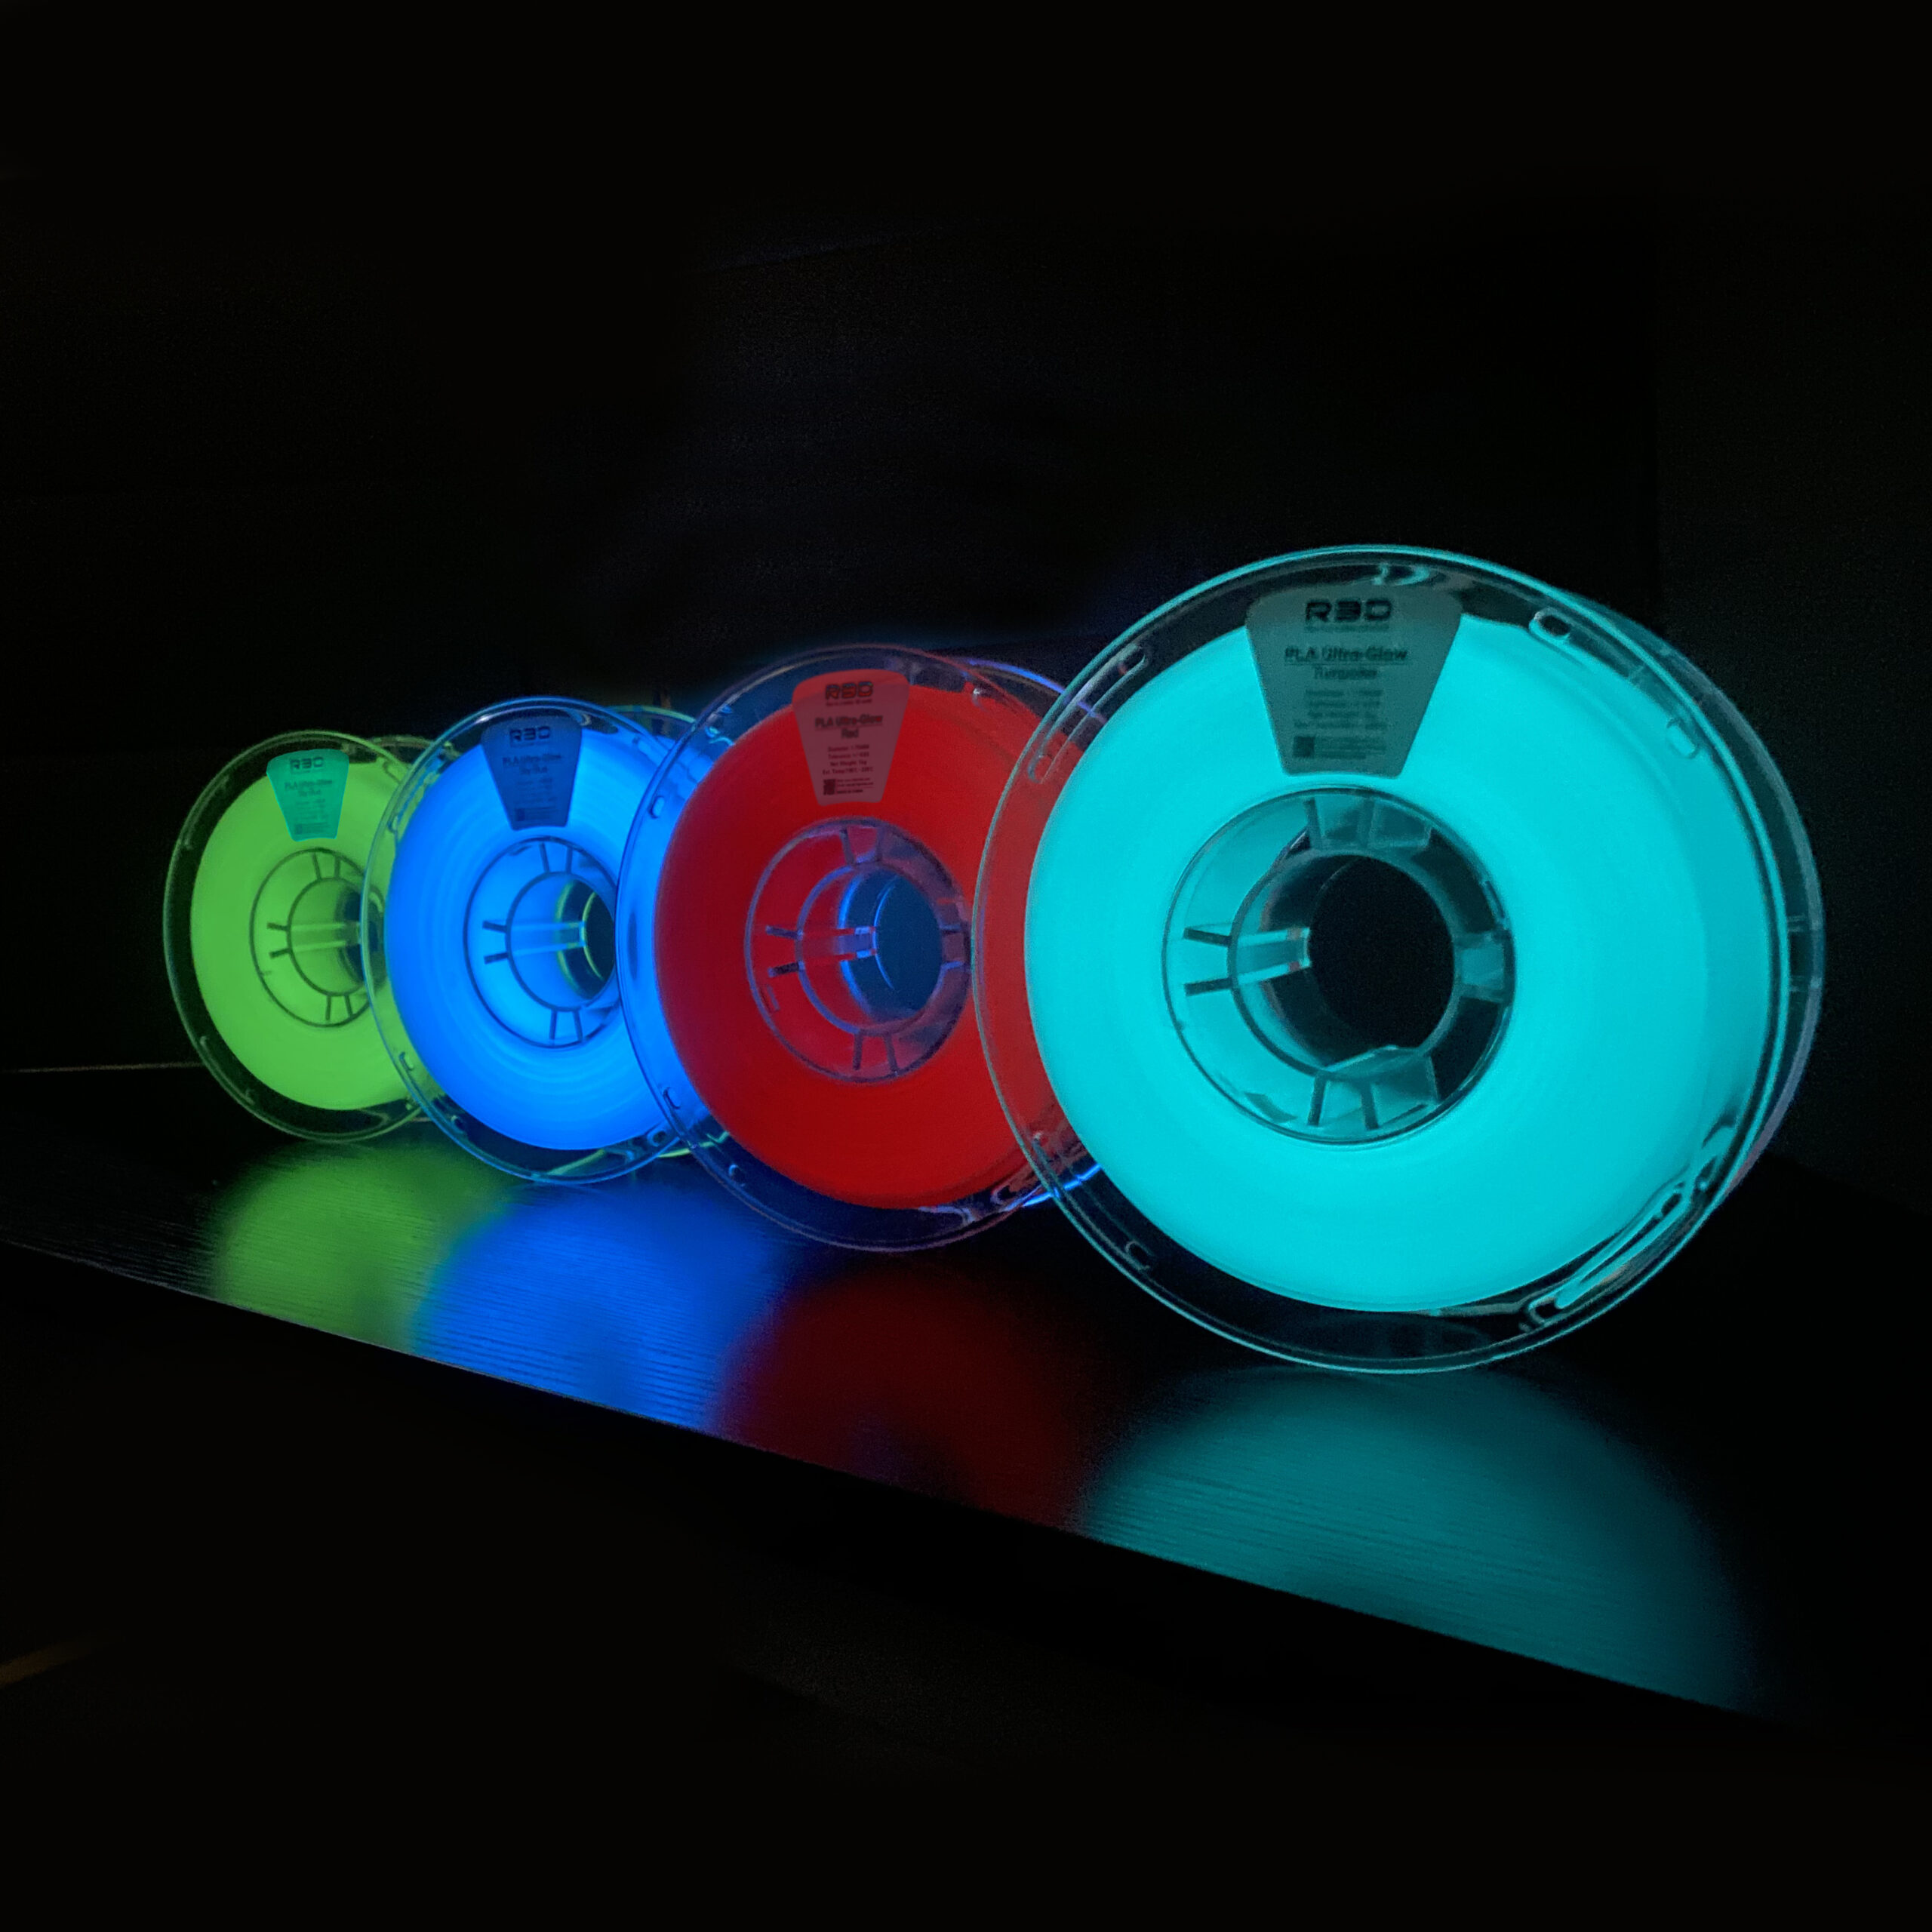
O PLA Ultra Glow da R3D é um filamento de impressão 3D de alta qualidade que apresenta um efeito luminoso único que adiciona um toque mágico aos seus projetos. Com sua cor verde neon vibrante, facilidade de impressão, e sustentabilidade, é uma escolha inteligente para projetos de impressão 3D que exigem um toque especial. Não perca a oportunidade de experimentar esta novidade!

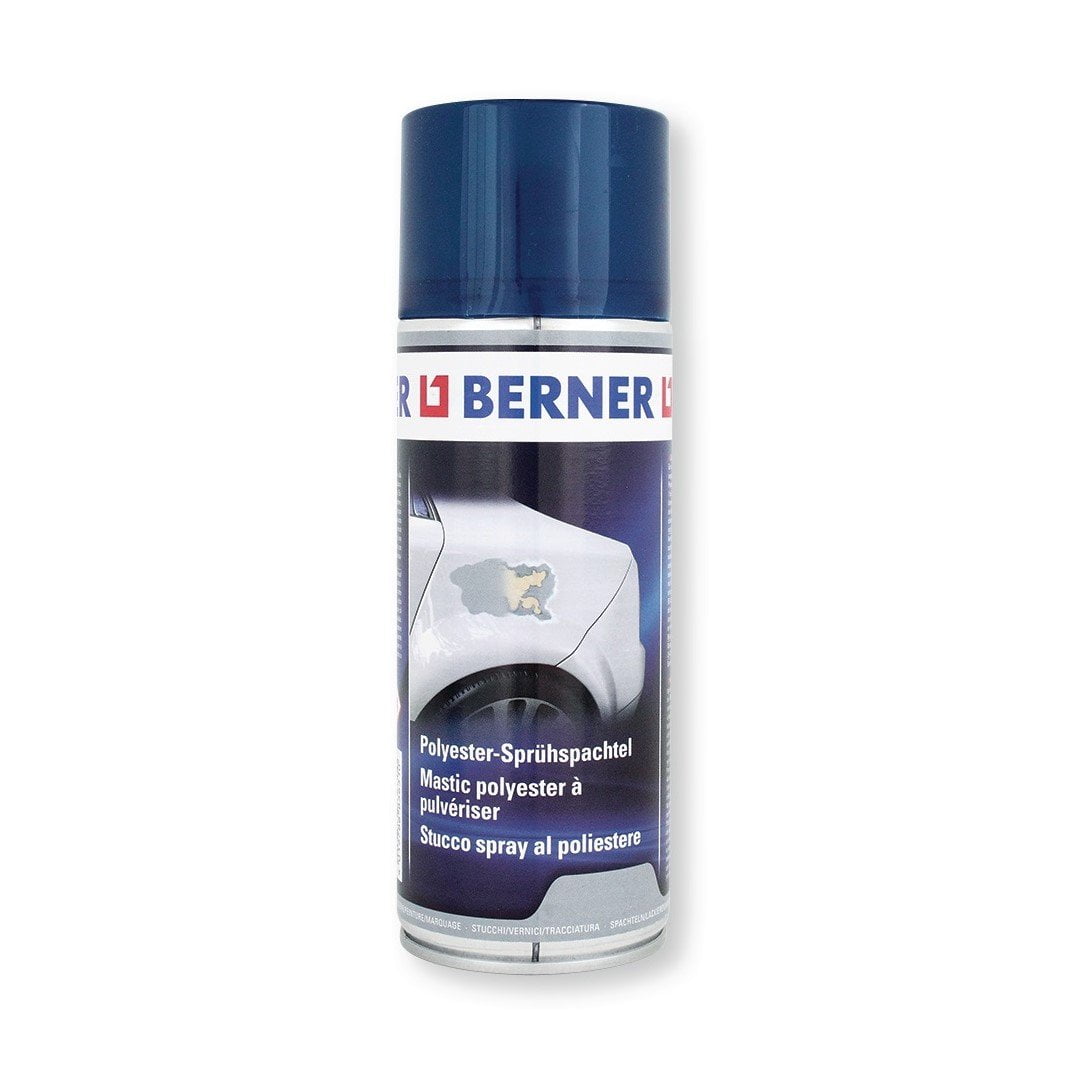
Para uma correcta manutenção da sua impressora 3D, recomendamos sempre que trocar de material de filamento 3D, a efectuar uma purga com filamento especial de limpeza.
Desta forma garante que não ficam vestígios de material nas paredes do nozzle, evitando o acumular de crosta que é criado sempre que efectua trocas de material.
Com este produto evita problema como "clogs" e "jams" e fará com que o seu nozzle mantenha-se sempre limpo, durando muito mais tempo.
Poderá encontrar a partir de 1.49€ no seguinte LINK

Para obter maior aderência à superfície da sua impressora 3D recomendamos a aplicar 3DLAC na base da plataforma.
Poderá encontrar no seguinte LINK

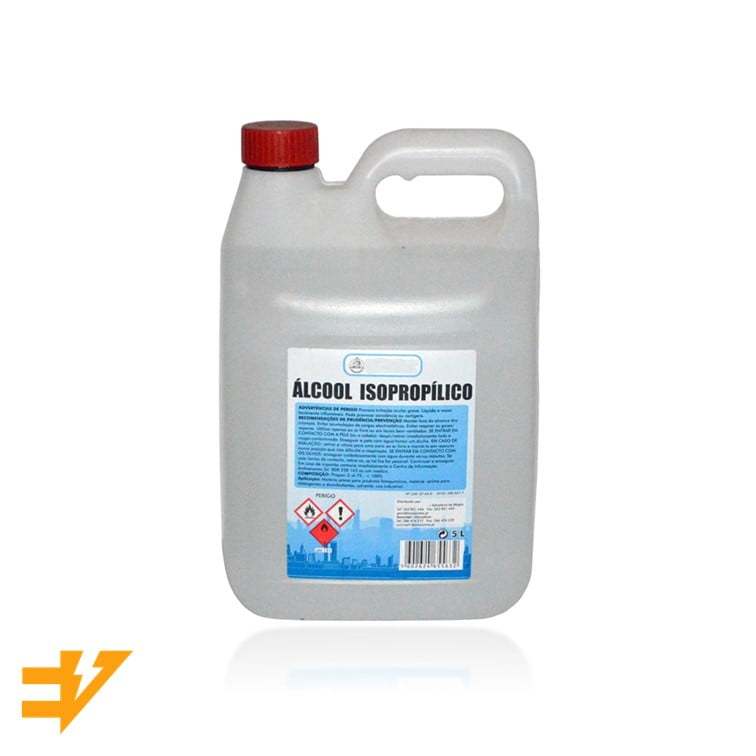
Este material é altamente higroscópico, absorvendo rapidamente a humidade do ar passados poucos minutos após aberto, impossibilitando desta forma a correcta impressão 3D do mesmo. O resultado das impressões 3D de materiais com humidade tendem a ser frágeis e de acabamento irregular ou em certos casos, torna-se simplesmente impossíveis de imprimir.
Deverá de usar soluções de caixas fechadas com dessecante como sílica ou caixas próprias secadoras de filamento.
Poderá encontrar no seguinte LINK
Em conclusão, se procura filamentos 3D de alta qualidade, confiáveis e acessíveis, a marca R3D é a escolha certa. Com uma variedade de cores e tamanhos, além de benefícios exclusivos e utilidades diversas, os filamentos R3D atenderão às suas expectativas.
1kg - Rolo
PLA Ultra-Glow
Multicolor - Cor
1.75mm (+-0.03mm) - Espessura / Tolerância de diâmetro
190º a 210º - Temp. recomendada do Hotend
50º a 80º - Temp. recomendada da Heated bed (0ºC mediante aplicação de 3DLAC)
Muito Fácil - Facilidade de Impressão
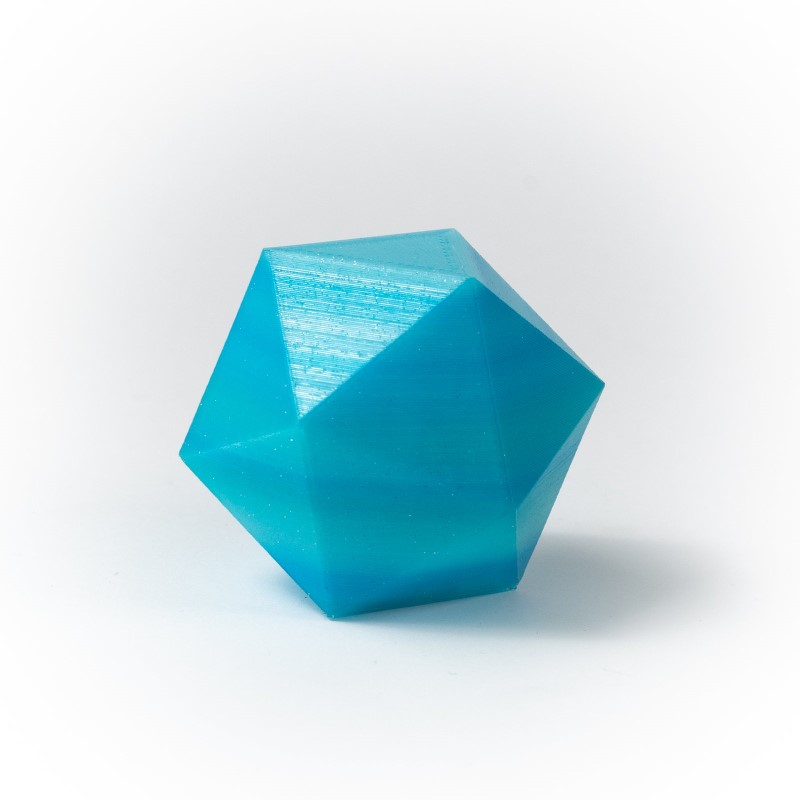
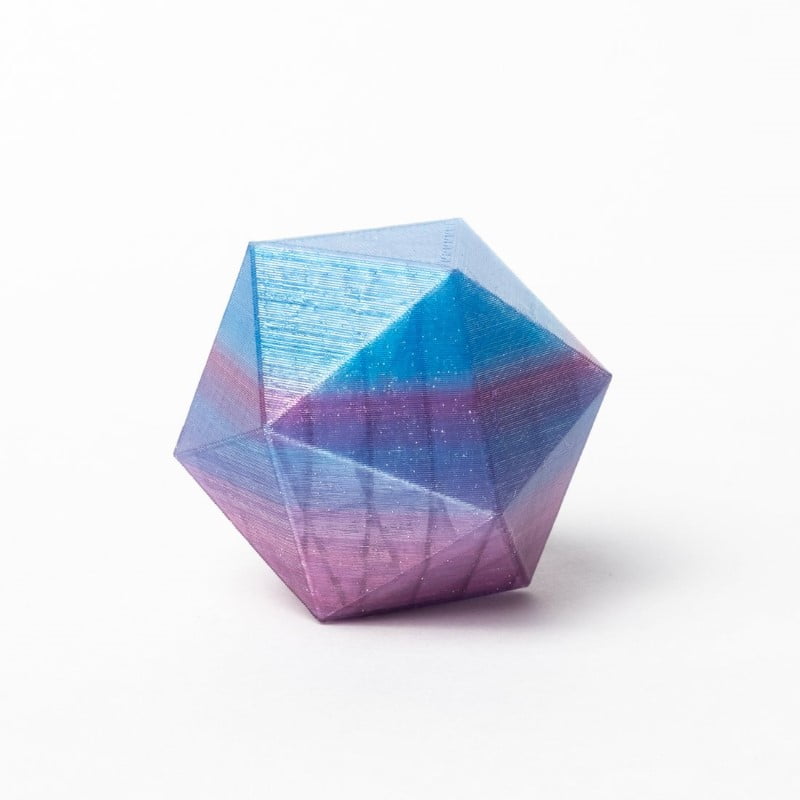
Faça ondas com o HTPLA Marine Dream Blue da Protopasta !
Um filamento único inspirado pelos nossos belos oceanos.
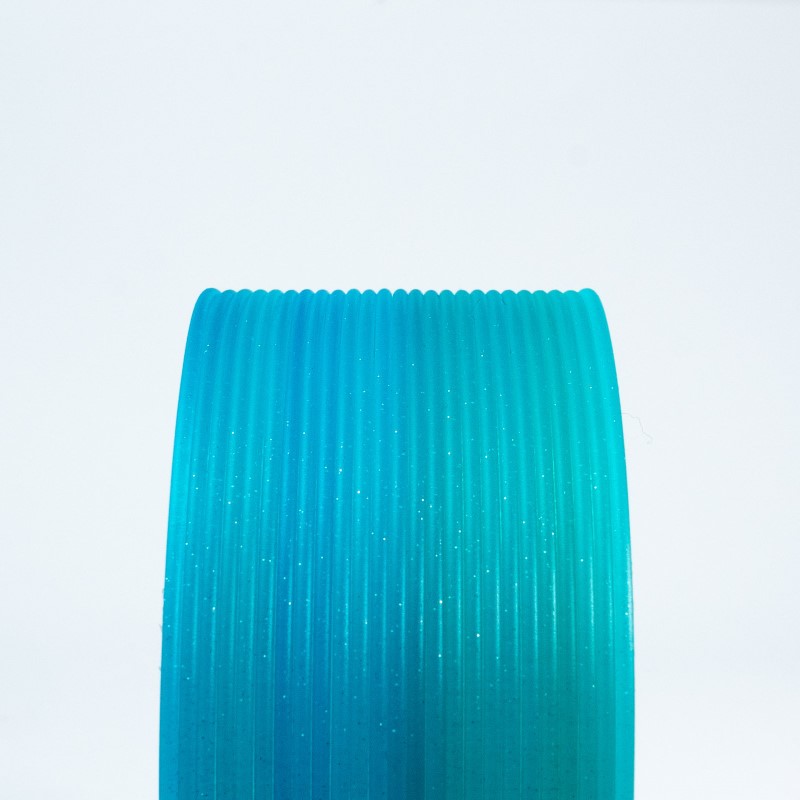
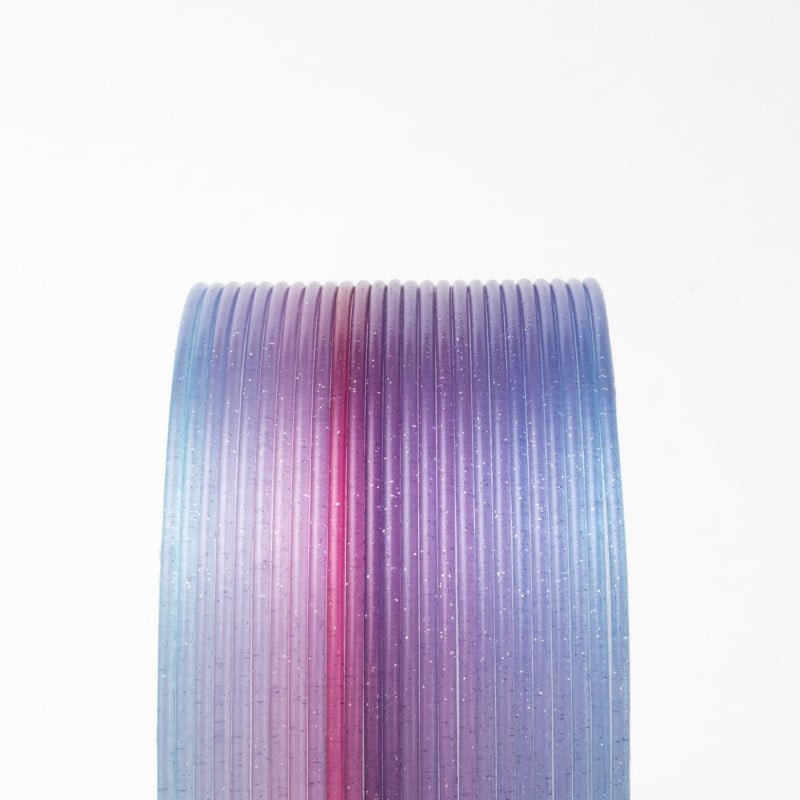
Azul translúcido e verde com branco e um toque de brilho prateado.
Um filamento de Endless Pastabilities em celebração do Dia da Terra 2021.
Os resultados irão variar, uma vez que cada transição de cor e bobina é única.

ProtoPasta é uma empresa situada nos Estados Unidos da América, de produção de filamentos para impressão 3D de alta qualidade.
Caracterizada pelos rolos feitos em cartão, esta marca é mundialmente famosa por ser especializada em materiais como PLA e ABS modificados com outros materiais, como o PLA Magnético; o PLA Condutivo; PLA de fibra de carbono; HTPLA de cobre, latão ou bronze; ou o ABS-PC.
Semi crystalline, heat treatable PLA for high temp use
Density: 1.24 g/cc
Length: 346 m/kg (1.75) 130 m/kg (2.85)
Typical Printing Temp: 205-225 C
Glass Transition (Tg)*: 60 C
Peak Crystallization (Tc)**: 95-115 C
Onset to Melt (Tm)***: 155 C
Typical change when heat treated: -2% x/y +1% z
Link to Safety Data Page
*max use with no heat treat & max platform temp
**heat treating @ temp 10+ min depending on size/mass
***max use when heat treated (annealed or crystallized)
HTPLA prints well at 205-225 C, however it's important to match temp to your hardware & volume flow rate. With a typical hotend, you should be able to print at 205 C without jamming at a low flow rate. In machines with hardware that tends towards jamming, consider this video with Joel Telling.
Lower volume flows require lower temps, while higher volume flows require higher temps. In the previously-mentioned video, one way to overcome jamming is to set your temp to a higher-than-typical 240 C. This should then be matched with a high flow rate for a quality printing result.
For direct drives with a short distance between drive gears & nozzle, volume flows can approach 7-8 cubic mm/s or more if printing hot to overcome jamming. For bowden tubes where the distance between drive gear & nozzle are great or less powerful hotends, as little as 2 and as much as 4 cubic mm/s may be the limit. Beware of unintended speed changes from faster infills & slowing down for outlines or short layers. Consider our Ultimaker-specific blog for more on this topic.
A constant speed throughout the part is ideal from an extrusion perspective. Knowing your extrusion width, layer thickness & speed you can calculate your volume flow rate with the calculator like found in the previously-mentioned Ultimaker blog. Alternatively, if you know your volume flow rate limit, extrusion width & layer thickness, you can calculate your speed limit.
PLA & HTPLA are amorphous in structure as printed (no heat treating) & though both are adequate performers in an office environment, they have poor temperature stability, loosing significant stiffness at temps nearing 60 C. Different than standard PLA, HTPLA is designed to survive heat treating for higher temp stability in a no/minimal load condition to near onset of melting (155 C). That's an astonishing improvement in thermal stability compared to standard PLA after a quick bake in the oven after printing.
In as little as 5-10 minutes for small, thin parts, HTPLA quickly crystallizes in an oven at 95-115 C (200-240 F) to become more stiff & hold form above glass transition (60 C). Depending on part geometry, setup & technique, parts can deform and shrink. Best results are with flat and/or supported parts with 100% infill. In this instance we experienced x/y shrinkage of about 2% & growth of about 1% in z.
Be sure to avoid hot spots (non-radiating surfaces & no glowing coils) in the oven used for baking & experiment before baking a prized part. Un-printed filament works great for experimentation & translucent makes the transformation most visible! Heat treating is an art, but the resulting improved thermal performance, if needed, is well-worth exploring. You'll be shocked by the improved thermal stability of your HTPLA parts!!!
Looking for increased heat resistance without the need to switch to ABS? Protopasta High Temperature PLA offers heat deflection of up to 88° C (190.4° F) compared to standard PLA of 45-54° C (113-135° F). This makes it a great choice for moving parts (gears, RepRap pieces, etc) or prints that would face moderately high temperatures. Our High Temperature PLA is white, but can be painted after annealing.
We've created this page to bring you a premium PLA and HTPLA printing experience that rivals our premium material. Follow below to improve your 3D printing experience. In other words, here's your shortcut to awesomeness with pasta. If at the end of this document you have questions or need assistance, please contact us at [email protected].
Loose coils can be very tricky to manage. Going cowboy on your spool handling can quickly end up in a frustrating, tangled mess. Keep your loose coils wrangled with a spool holder like masterspool for a more trouble-free experience. Find out more about loose coil handling in Keith's blog post.
And for spooled filament, never let go of the loose end. When not in the printer extruder, tuck it away in the cardboard spool's corrugation! Also, avoid sharp bends and excessive force when loading filament into your printer.
At Proto-pasta, we make high quality filament. We aspire to make exceptional results easy, but a positive result is very much dependent on your hardware, set-up, adjustments, and process parameters. Matching hardware with process and material for a positive experience is not always straight-forward, but you can start by pairing the following settings with your printer for a good starting point, then tune or troubleshoot as required.
Volume flow rate together with temperature dictates how melted the material is. This is hardware & condition dependent based on hot end, nozzle & extruder type, material & manufacturer as well as layer fan type, position & settings. Extrusion width, layer thickness & speed changes affect volume flow which may change required/desired temperature.
Post your prints & tag us @Proto_pasta on Twitter and Instagram. Need more help? Consider typical pitfalls and fixes below.
We visited Joel and ended up with a helpful video on the subject:
Para uma correcta manutenção da sua impressora 3D, recomendamos sempre que trocar de material de filamento 3D, a efectuar uma purga com filamento especial de limpeza.
Desta forma garante que não ficam vestígios de material nas paredes do nozzle, evitando o acumular de crosta que é criado sempre que efectua trocas de material.
Com este produto evita problema como "clogs" e "jams" e fará com que o seu nozzle mantenha-se sempre limpo, durando muito mais tempo.
Poderá encontrar a partir de 1.49€ no seguinte LINK

Para obter maior aderência à superfície da sua impressora 3D recomendamos a aplicar 3DLAC na base da plataforma.
Poderá encontrar no seguinte LINK
Este material é altamente higroscópico, absorvendo rapidamente a humidade do ar passados poucos minutos após aberto, impossibilitando desta forma a correcta impressão 3D do mesmo. O resultado das impressões 3D de materiais com humidade tendem a ser frágeis e de acabamento irregular ou em certos casos, torna-se simplesmente impossíveis de imprimir.
Deverá de usar soluções de caixas fechadas com dessecante como sílica ou caixas próprias secadoras de filamento.
Poderá encontrar no seguinte LINK
Download:
Technical and Safety Data Sheet
50g- Rolo
HTPLA Marine Dream Blue Multicolor HTPLA - Cor
1.75mm (+-0.05mm) - Espessura / Tolerância de diâmetro
Muito Fácil - Facilidade de Impressão
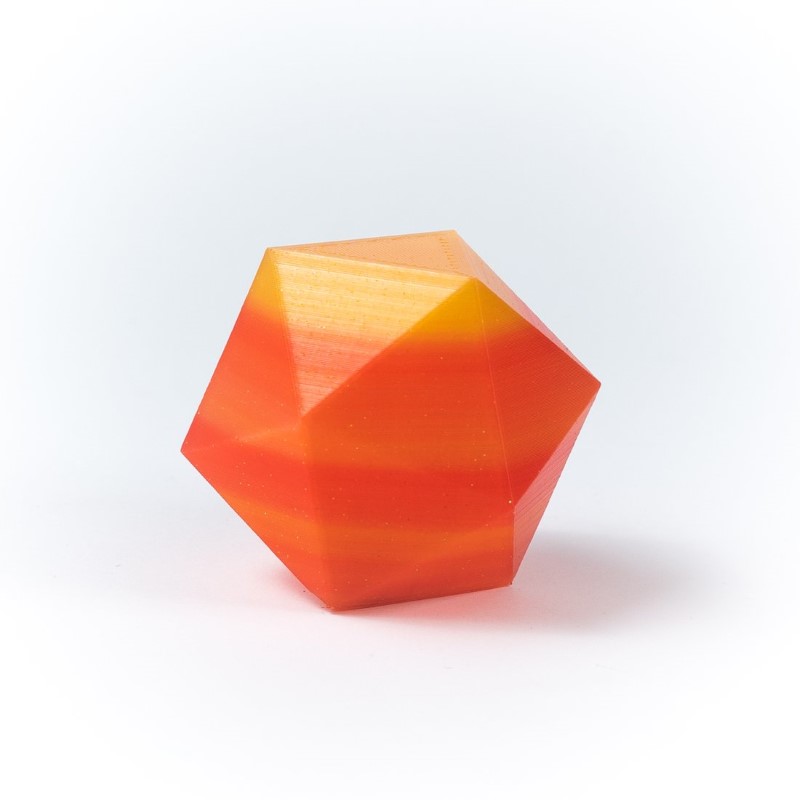
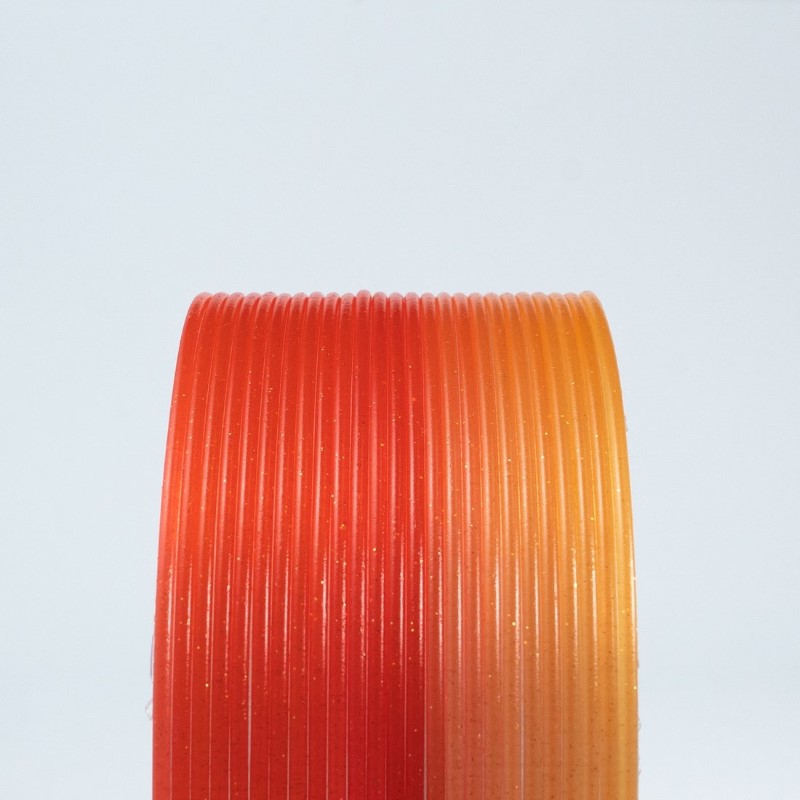
HTPLA Citrus Sunrise Orange Multicolor, um filamento variegado único inspirado pelo nosso glorioso sol
Translúcido vermelho, laranja e amarelo com um toque de brilho dourado
Um filamento de Endless Pastabilities em celebração do Dia da Terra 2021
Os resultados irão variar, uma vez que cada transição de cor e bobina é única
ProtoPasta é uma empresa situada nos Estados Unidos da América, de produção de filamentos para impressão 3D de alta qualidade.
Caracterizada pelos rolos feitos em cartão, esta marca é mundialmente famosa por ser especializada em materiais como PLA e ABS modificados com outros materiais, como o PLA Magnético; o PLA Condutivo; PLA de fibra de carbono; HTPLA de cobre, latão ou bronze; ou o ABS-PC.
Semi crystalline, heat treatable PLA for high temp use
Density: 1.24 g/cc
Length: 346 m/kg (1.75) 130 m/kg (2.85)
Typical Printing Temp: 205-225 C
Glass Transition (Tg)*: 60 C
Peak Crystallization (Tc)**: 95-115 C
Onset to Melt (Tm)***: 155 C
Typical change when heat treated: -2% x/y +1% z
Link to Safety Data Page
*max use with no heat treat & max platform temp
**heat treating @ temp 10+ min depending on size/mass
***max use when heat treated (annealed or crystallized)
HTPLA prints well at 205-225 C, however it's important to match temp to your hardware & volume flow rate. With a typical hotend, you should be able to print at 205 C without jamming at a low flow rate. In machines with hardware that tends towards jamming, consider this video with Joel Telling.
Lower volume flows require lower temps, while higher volume flows require higher temps. In the previously-mentioned video, one way to overcome jamming is to set your temp to a higher-than-typical 240 C. This should then be matched with a high flow rate for a quality printing result.
For direct drives with a short distance between drive gears & nozzle, volume flows can approach 7-8 cubic mm/s or more if printing hot to overcome jamming. For bowden tubes where the distance between drive gear & nozzle are great or less powerful hotends, as little as 2 and as much as 4 cubic mm/s may be the limit. Beware of unintended speed changes from faster infills & slowing down for outlines or short layers. Consider our Ultimaker-specific blog for more on this topic.
A constant speed throughout the part is ideal from an extrusion perspective. Knowing your extrusion width, layer thickness & speed you can calculate your volume flow rate with the calculator like found in the previously-mentioned Ultimaker blog. Alternatively, if you know your volume flow rate limit, extrusion width & layer thickness, you can calculate your speed limit.
PLA & HTPLA are amorphous in structure as printed (no heat treating) & though both are adequate performers in an office environment, they have poor temperature stability, loosing significant stiffness at temps nearing 60 C. Different than standard PLA, HTPLA is designed to survive heat treating for higher temp stability in a no/minimal load condition to near onset of melting (155 C). That's an astonishing improvement in thermal stability compared to standard PLA after a quick bake in the oven after printing.
In as little as 5-10 minutes for small, thin parts, HTPLA quickly crystallizes in an oven at 95-115 C (200-240 F) to become more stiff & hold form above glass transition (60 C). Depending on part geometry, setup & technique, parts can deform and shrink. Best results are with flat and/or supported parts with 100% infill. In this instance we experienced x/y shrinkage of about 2% & growth of about 1% in z.
Be sure to avoid hot spots (non-radiating surfaces & no glowing coils) in the oven used for baking & experiment before baking a prized part. Un-printed filament works great for experimentation & translucent makes the transformation most visible! Heat treating is an art, but the resulting improved thermal performance, if needed, is well-worth exploring. You'll be shocked by the improved thermal stability of your HTPLA parts!!!
Looking for increased heat resistance without the need to switch to ABS? Protopasta High Temperature PLA offers heat deflection of up to 88° C (190.4° F) compared to standard PLA of 45-54° C (113-135° F). This makes it a great choice for moving parts (gears, RepRap pieces, etc) or prints that would face moderately high temperatures. Our High Temperature PLA is white, but can be painted after annealing.

We've created this page to bring you a premium PLA and HTPLA printing experience that rivals our premium material. Follow below to improve your 3D printing experience. In other words, here's your shortcut to awesomeness with pasta. If at the end of this document you have questions or need assistance, please contact us at [email protected].
Loose coils can be very tricky to manage. Going cowboy on your spool handling can quickly end up in a frustrating, tangled mess. Keep your loose coils wrangled with a spool holder like masterspool for a more trouble-free experience. Find out more about loose coil handling in Keith's blog post.
And for spooled filament, never let go of the loose end. When not in the printer extruder, tuck it away in the cardboard spool's corrugation! Also, avoid sharp bends and excessive force when loading filament into your printer.
At Proto-pasta, we make high quality filament. We aspire to make exceptional results easy, but a positive result is very much dependent on your hardware, set-up, adjustments, and process parameters. Matching hardware with process and material for a positive experience is not always straight-forward, but you can start by pairing the following settings with your printer for a good starting point, then tune or troubleshoot as required.
Volume flow rate together with temperature dictates how melted the material is. This is hardware & condition dependent based on hot end, nozzle & extruder type, material & manufacturer as well as layer fan type, position & settings. Extrusion width, layer thickness & speed changes affect volume flow which may change required/desired temperature.
Post your prints & tag us @Proto_pasta on Twitter and Instagram. Need more help? Consider typical pitfalls and fixes below.
We visited Joel and ended up with a helpful video on the subject:
Para uma correcta manutenção da sua impressora 3D, recomendamos sempre que trocar de material de filamento 3D, a efectuar uma purga com filamento especial de limpeza.
Desta forma garante que não ficam vestígios de material nas paredes do nozzle, evitando o acumular de crosta que é criado sempre que efectua trocas de material.
Com este produto evita problema como "clogs" e "jams" e fará com que o seu nozzle mantenha-se sempre limpo, durando muito mais tempo.
Poderá encontrar a partir de 1.49€ no seguinte LINK
Para obter maior aderência à superfície da sua impressora 3D recomendamos a aplicar 3DLAC na base da plataforma.
Poderá encontrar no seguinte LINK
Este material é altamente higroscópico, absorvendo rapidamente a humidade do ar passados poucos minutos após aberto, impossibilitando desta forma a correcta impressão 3D do mesmo. O resultado das impressões 3D de materiais com humidade tendem a ser frágeis e de acabamento irregular ou em certos casos, torna-se simplesmente impossíveis de imprimir.
Deverá de usar soluções de caixas fechadas com dessecante como sílica ou caixas próprias secadoras de filamento.
Poderá encontrar no seguinte LINK
Download:
Technical and Safety Data Sheet
50g- Rolo
HTPLA Nebula Multicolor HTPLA - Cor
1.75mm (+-0.05mm) - Espessura / Tolerância de diâmetro
Muito Fácil - Facilidade de Impressão
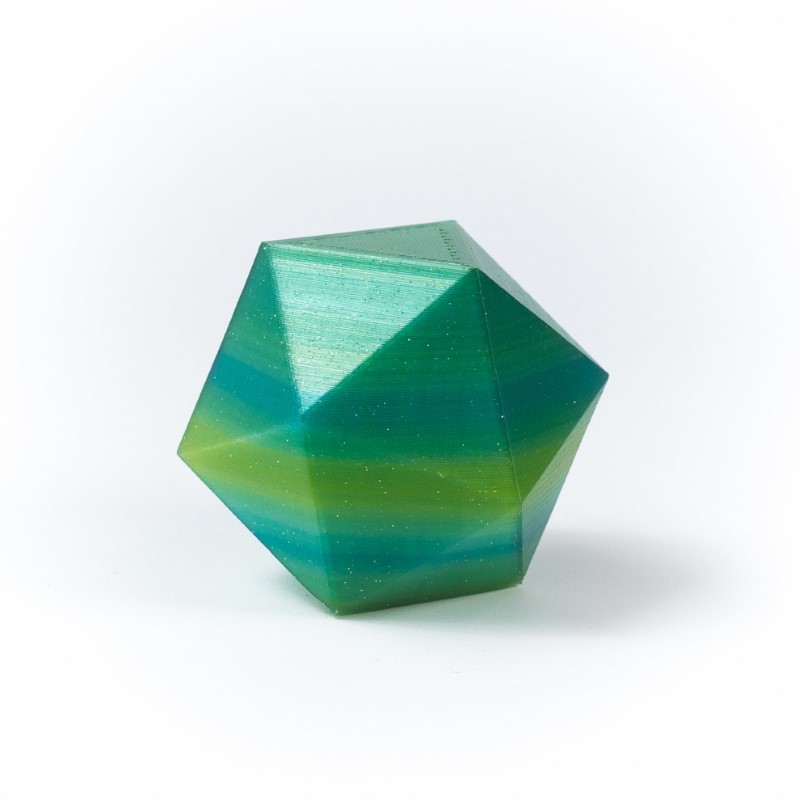
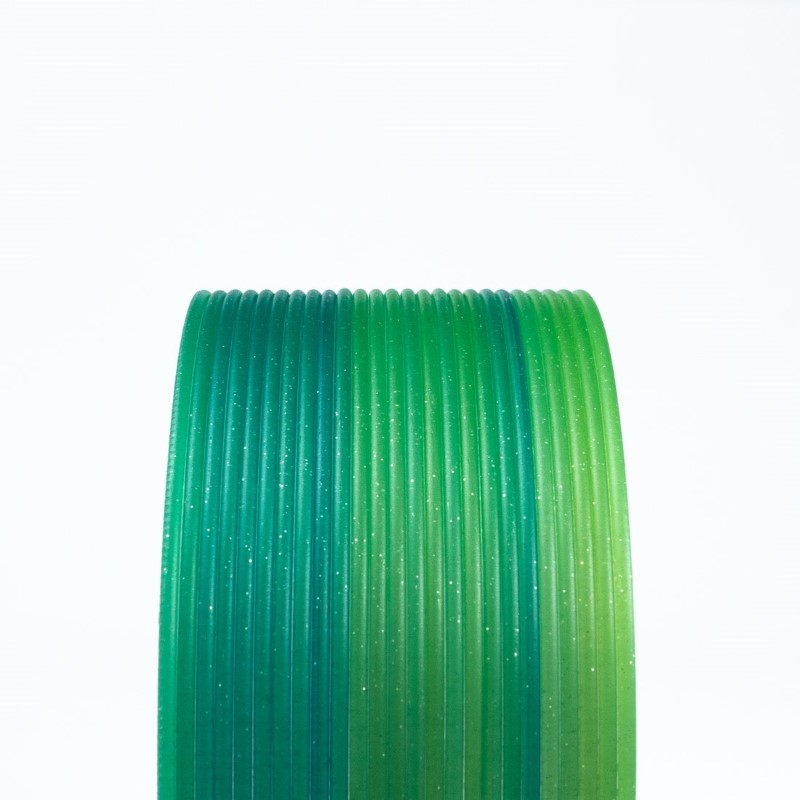
Não folhegue sem Fantasia da Floresta!
HTPLA Forest Fantasy Green Multicolor, um filamento variegado único inspirado nas nossas encantadoras florestas
Verde translúcido de azul para amarelo com um toque de brilho prateado
Um filamento de Endless Pastabilities em celebração do Dia da Terra 2021
Os resultados irão variar, uma vez que cada transição de cor e bobina é única
ProtoPasta é uma empresa situada nos Estados Unidos da América, de produção de filamentos para impressão 3D de alta qualidade.
Caracterizada pelos rolos feitos em cartão, esta marca é mundialmente famosa por ser especializada em materiais como PLA e ABS modificados com outros materiais, como o PLA Magnético; o PLA Condutivo; PLA de fibra de carbono; HTPLA de cobre, latão ou bronze; ou o ABS-PC.
Semi crystalline, heat treatable PLA for high temp use
Density: 1.24 g/cc
Length: 346 m/kg (1.75) 130 m/kg (2.85)
Typical Printing Temp: 205-225 C
Glass Transition (Tg)*: 60 C
Peak Crystallization (Tc)**: 95-115 C
Onset to Melt (Tm)***: 155 C
Typical change when heat treated: -2% x/y +1% z
Link to Safety Data Page
*max use with no heat treat & max platform temp
**heat treating @ temp 10+ min depending on size/mass
***max use when heat treated (annealed or crystallized)
HTPLA prints well at 205-225 C, however it's important to match temp to your hardware & volume flow rate. With a typical hotend, you should be able to print at 205 C without jamming at a low flow rate. In machines with hardware that tends towards jamming, consider this video with Joel Telling.
Lower volume flows require lower temps, while higher volume flows require higher temps. In the previously-mentioned video, one way to overcome jamming is to set your temp to a higher-than-typical 240 C. This should then be matched with a high flow rate for a quality printing result.
For direct drives with a short distance between drive gears & nozzle, volume flows can approach 7-8 cubic mm/s or more if printing hot to overcome jamming. For bowden tubes where the distance between drive gear & nozzle are great or less powerful hotends, as little as 2 and as much as 4 cubic mm/s may be the limit. Beware of unintended speed changes from faster infills & slowing down for outlines or short layers. Consider our Ultimaker-specific blog for more on this topic.
A constant speed throughout the part is ideal from an extrusion perspective. Knowing your extrusion width, layer thickness & speed you can calculate your volume flow rate with the calculator like found in the previously-mentioned Ultimaker blog. Alternatively, if you know your volume flow rate limit, extrusion width & layer thickness, you can calculate your speed limit.
PLA & HTPLA are amorphous in structure as printed (no heat treating) & though both are adequate performers in an office environment, they have poor temperature stability, loosing significant stiffness at temps nearing 60 C. Different than standard PLA, HTPLA is designed to survive heat treating for higher temp stability in a no/minimal load condition to near onset of melting (155 C). That's an astonishing improvement in thermal stability compared to standard PLA after a quick bake in the oven after printing.
In as little as 5-10 minutes for small, thin parts, HTPLA quickly crystallizes in an oven at 95-115 C (200-240 F) to become more stiff & hold form above glass transition (60 C). Depending on part geometry, setup & technique, parts can deform and shrink. Best results are with flat and/or supported parts with 100% infill. In this instance we experienced x/y shrinkage of about 2% & growth of about 1% in z.
Be sure to avoid hot spots (non-radiating surfaces & no glowing coils) in the oven used for baking & experiment before baking a prized part. Un-printed filament works great for experimentation & translucent makes the transformation most visible! Heat treating is an art, but the resulting improved thermal performance, if needed, is well-worth exploring. You'll be shocked by the improved thermal stability of your HTPLA parts!!!
Looking for increased heat resistance without the need to switch to ABS? Protopasta High Temperature PLA offers heat deflection of up to 88° C (190.4° F) compared to standard PLA of 45-54° C (113-135° F). This makes it a great choice for moving parts (gears, RepRap pieces, etc) or prints that would face moderately high temperatures. Our High Temperature PLA is white, but can be painted after annealing.
We've created this page to bring you a premium PLA and HTPLA printing experience that rivals our premium material. Follow below to improve your 3D printing experience. In other words, here's your shortcut to awesomeness with pasta. If at the end of this document you have questions or need assistance, please contact us at [email protected].
Loose coils can be very tricky to manage. Going cowboy on your spool handling can quickly end up in a frustrating, tangled mess. Keep your loose coils wrangled with a spool holder like masterspool for a more trouble-free experience. Find out more about loose coil handling in Keith's blog post.
And for spooled filament, never let go of the loose end. When not in the printer extruder, tuck it away in the cardboard spool's corrugation! Also, avoid sharp bends and excessive force when loading filament into your printer.
At Proto-pasta, we make high quality filament. We aspire to make exceptional results easy, but a positive result is very much dependent on your hardware, set-up, adjustments, and process parameters. Matching hardware with process and material for a positive experience is not always straight-forward, but you can start by pairing the following settings with your printer for a good starting point, then tune or troubleshoot as required.
Volume flow rate together with temperature dictates how melted the material is. This is hardware & condition dependent based on hot end, nozzle & extruder type, material & manufacturer as well as layer fan type, position & settings. Extrusion width, layer thickness & speed changes affect volume flow which may change required/desired temperature.
Post your prints & tag us @Proto_pasta on Twitter and Instagram. Need more help? Consider typical pitfalls and fixes below.
We visited Joel and ended up with a helpful video on the subject:
Para uma correcta manutenção da sua impressora 3D, recomendamos sempre que trocar de material de filamento 3D, a efectuar uma purga com filamento especial de limpeza.
Desta forma garante que não ficam vestígios de material nas paredes do nozzle, evitando o acumular de crosta que é criado sempre que efectua trocas de material.
Com este produto evita problema como "clogs" e "jams" e fará com que o seu nozzle mantenha-se sempre limpo, durando muito mais tempo.
Poderá encontrar a partir de 1.49€ no seguinte LINK
Para obter maior aderência à superfície da sua impressora 3D recomendamos a aplicar 3DLAC na base da plataforma.
Poderá encontrar no seguinte LINK
Este material é altamente higroscópico, absorvendo rapidamente a humidade do ar passados poucos minutos após aberto, impossibilitando desta forma a correcta impressão 3D do mesmo. O resultado das impressões 3D de materiais com humidade tendem a ser frágeis e de acabamento irregular ou em certos casos, torna-se simplesmente impossíveis de imprimir.
Deverá de usar soluções de caixas fechadas com dessecante como sílica ou caixas próprias secadoras de filamento.
Poderá encontrar no seguinte LINK
Download:
Technical and Safety Data Sheet
50g- Rolo
HTPLA Forest Fantasy Green Multicolor HTPLA - Cor
1.75mm (+-0.05mm) - Espessura / Tolerância de diâmetro
Muito Fácil - Facilidade de Impressão
ProtoPasta é uma empresa situada nos Estados Unidos da América, de produção de filamentos para impressão 3D de alta qualidade.
Caracterizada pelos rolos feitos em cartão, esta marca é mundialmente famosa por ser especializada em materiais como PLA e ABS modificados com outros materiais, como o PLA Magnético; o PLA Condutivo; PLA de fibra de carbono; HTPLA de cobre, latão ou bronze; ou o ABS-PC.
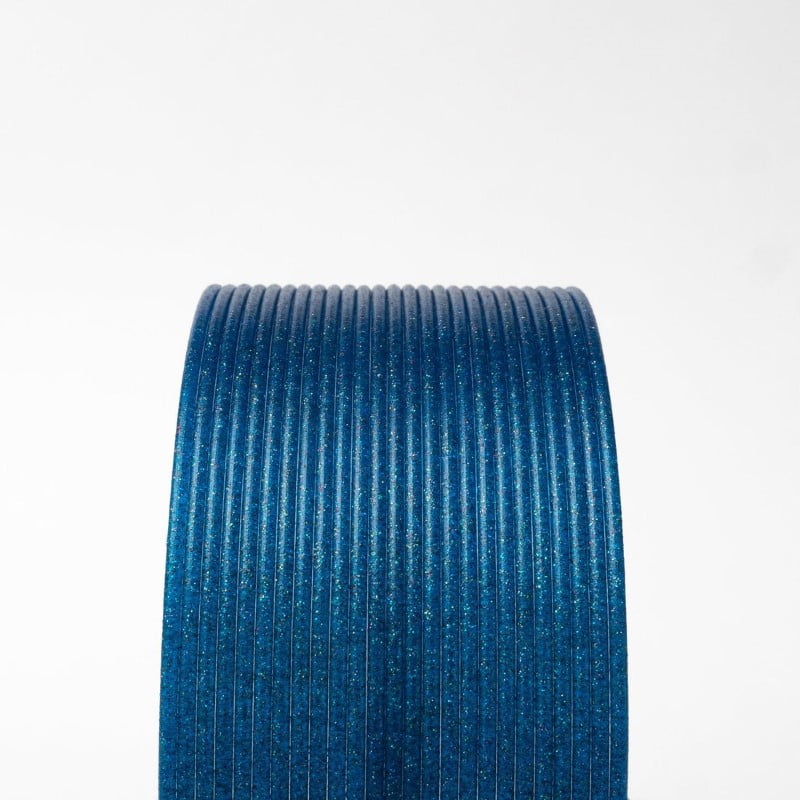
Designed by Protopasta Filament-making Workshop attendee Ben Nickles and voted "favorite " by the attendees, I introduce to you Blue Wonder Glitter Flake HTPLA .
On July 21st, our workshop attendees got first access to our new gold and multi-color glitter flake concentrate during our first ever filament-making workshop!
Ben seized the day in designing this one-of-a-kind metallic blue PLA filament and everyone loved it so much that we agreed to release it, commemorating the experience.
Other than being an original creation, you might wonder how this blue is different than others? Well, it's translucent and has big multi-color flecks!
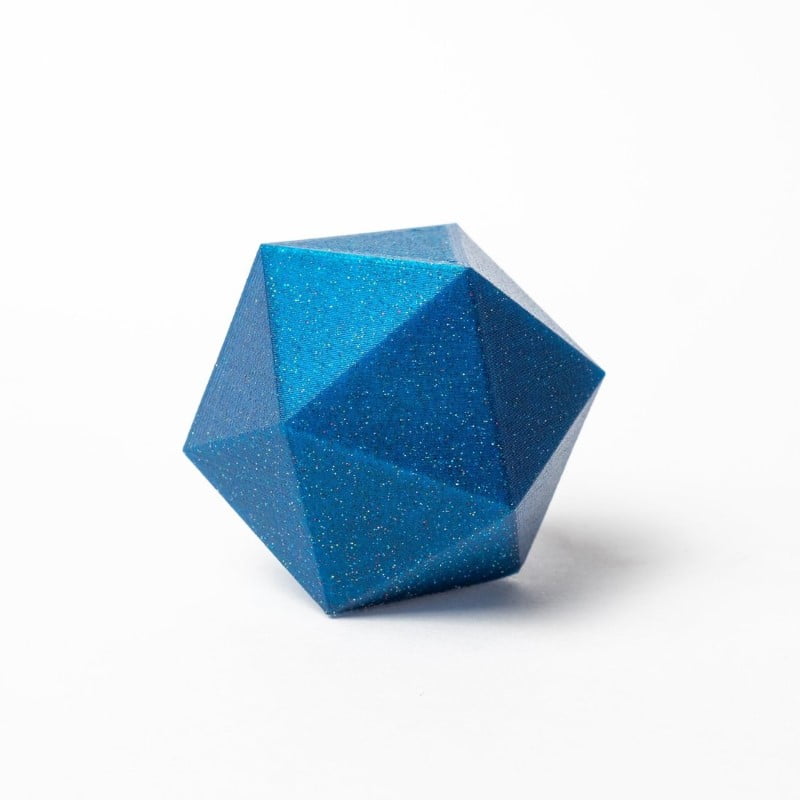
For this improved the performance, your prints should be baked in an oven until you see a change from translucent to opaque with reduced gloss. This visual change indicating the improved performance! We've seen the change take place in 5-10 minutes on thin walled parts but can take an hour or more. We've had good luck in a quality, at home convection oven at 110C (225F). Parts will get very "floppy" before becoming more firm, so please leave supports on your parts or support them and bake them on a flat, non-radiating surface (like glass, ceramic, or composite).
No abrasive fillers so expect normal wear with standard nozzles.
In our experience, good results were achieved using standard PLA parameters ranging from 195-225C nozzle with standard build surface preparation (blue tape, glue stick, or BuildTak). No heated bed required but up to 60C is okay. Beware, if the bed temperature is too high, your part base could actually heat treat while printing, increasing warping and decreasing adhesion. Some shrinkage will occur in the heat treating process, so dimension critical parts may need to be scaled appropriately (as much as 2.5% in our experience).
Looking for increased heat resistance without the need to switch to ABS? Protopasta High Temperature PLA offers heat deflection of up to 88° C (190.4° F) compared to standard PLA of 45-54° C (113-135° F). This makes it a great choice for moving parts (gears, RepRap pieces, etc) or prints that would face moderately high temperatures. Our High Temperature PLA is white, but can be painted after annealing.
We've created this page to bring you a premium PLA and HTPLA printing experience that rivals our premium material. Follow below to improve your 3D printing experience. In other words, here's your shortcut to awesomeness with pasta. If at the end of this document you have questions or need assistance, please contact us at [email protected].
Loose coils can be very tricky to manage. Going cowboy on your spool handling can quickly end up in a frustrating, tangled mess. Keep your loose coils wrangled with a spool holder like masterspool for a more trouble-free experience. Find out more about loose coil handling in Keith's blog post.
And for spooled filament, never let go of the loose end. When not in the printer extruder, tuck it away in the cardboard spool's corrugation! Also, avoid sharp bends and excessive force when loading filament into your printer.
At Proto-pasta, we make high quality filament. We aspire to make exceptional results easy, but a positive result is very much dependent on your hardware, set-up, adjustments, and process parameters. Matching hardware with process and material for a positive experience is not always straight-forward, but you can start by pairing the following settings with your printer for a good starting point, then tune or troubleshoot as required.
Volume flow rate together with temperature dictates how melted the material is. This is hardware & condition dependent based on hot end, nozzle & extruder type, material & manufacturer as well as layer fan type, position & settings. Extrusion width, layer thickness & speed changes affect volume flow which may change required/desired temperature.
Post your prints & tag us @Proto_pasta on Twitter and Instagram. Need more help? Consider typical pitfalls and fixes below.
We visited Joel and ended up with a helpful video on the subject:
Para uma correcta manutenção da sua impressora 3D, recomendamos sempre que trocar de material de filamento 3D, a efectuar uma purga com filamento especial de limpeza.
Desta forma garante que não ficam vestígios de material nas paredes do nozzle, evitando o acumular de crosta que é criado sempre que efectua trocas de material.
Com este produto evita problema como "clogs" e "jams" e fará com que o seu nozzle mantenha-se sempre limpo, durando muito mais tempo.
Poderá encontrar a partir de 1.49€ no seguinte LINK
Para obter maior aderência à superfície da sua impressora 3D recomendamos a aplicar 3DLAC na base da plataforma.
Poderá encontrar no seguinte LINK
Este material é altamente higroscópico, absorvendo rapidamente a humidade do ar passados poucos minutos após aberto, impossibilitando desta forma a correcta impressão 3D do mesmo. O resultado das impressões 3D de materiais com humidade tendem a ser frágeis e de acabamento irregular ou em certos casos, torna-se simplesmente impossíveis de imprimir.
Deverá de usar soluções de caixas fechadas com dessecante como sílica ou caixas próprias secadoras de filamento.
Poderá encontrar no seguinte LINK
Download:
Technical and Safety Data Sheet
50g- Rolo
HTPLA Wonder Blue HTPLA with Multi-color Glitter ( Community Inspired ) - Cor
1.75mm (+-0.05mm) - Espessura / Tolerância de diâmetro
Muito Fácil - Facilidade de Impressão
ProtoPasta é uma empresa situada nos Estados Unidos da América, de produção de filamentos para impressão 3D de alta qualidade.
Caracterizada pelos rolos feitos em cartão, esta marca é mundialmente famosa por ser especializada em materiais como PLA e ABS modificados com outros materiais, como o PLA Magnético; o PLA Condutivo; PLA de fibra de carbono; HTPLA de cobre, latão ou bronze; ou o ABS-PC.
Semi crystalline, heat treatable PLA for high temp use
Density: 1.24 g/cc
Length: 346 m/kg (1.75) 130 m/kg (2.85)
Typical Printing Temp: 205-225 C
Glass Transition (Tg)*: 60 C
Peak Crystallization (Tc)**: 95-115 C
Onset to Melt (Tm)***: 155 C
Typical change when heat treated: -2% x/y +1% z
Link to Safety Data Page
*max use with no heat treat & max platform temp
**heat treating @ temp 10+ min depending on size/mass
***max use when heat treated (annealed or crystallized)
HTPLA prints well at 205-225 C, however it's important to match temp to your hardware & volume flow rate. With a typical hotend, you should be able to print at 205 C without jamming at a low flow rate. In machines with hardware that tends towards jamming, consider this video with Joel Telling.
Lower volume flows require lower temps, while higher volume flows require higher temps. In the previously-mentioned video, one way to overcome jamming is to set your temp to a higher-than-typical 240 C. This should then be matched with a high flow rate for a quality printing result.
For direct drives with a short distance between drive gears & nozzle, volume flows can approach 7-8 cubic mm/s or more if printing hot to overcome jamming. For bowden tubes where the distance between drive gear & nozzle are great or less powerful hotends, as little as 2 and as much as 4 cubic mm/s may be the limit. Beware of unintended speed changes from faster infills & slowing down for outlines or short layers. Consider our Ultimaker-specific blog for more on this topic.
A constant speed throughout the part is ideal from an extrusion perspective. Knowing your extrusion width, layer thickness & speed you can calculate your volume flow rate with the calculator like found in the previously-mentioned Ultimaker blog. Alternatively, if you know your volume flow rate limit, extrusion width & layer thickness, you can calculate your speed limit.
PLA & HTPLA are amorphous in structure as printed (no heat treating) & though both are adequate performers in an office environment, they have poor temperature stability, loosing significant stiffness at temps nearing 60 C. Different than standard PLA, HTPLA is designed to survive heat treating for higher temp stability in a no/minimal load condition to near onset of melting (155 C). That's an astonishing improvement in thermal stability compared to standard PLA after a quick bake in the oven after printing.
In as little as 5-10 minutes for small, thin parts, HTPLA quickly crystallizes in an oven at 95-115 C (200-240 F) to become more stiff & hold form above glass transition (60 C). Depending on part geometry, setup & technique, parts can deform and shrink. Best results are with flat and/or supported parts with 100% infill. In this instance we experienced x/y shrinkage of about 2% & growth of about 1% in z.
Be sure to avoid hot spots (non-radiating surfaces & no glowing coils) in the oven used for baking & experiment before baking a prized part. Un-printed filament works great for experimentation & translucent makes the transformation most visible! Heat treating is an art, but the resulting improved thermal performance, if needed, is well-worth exploring. You'll be shocked by the improved thermal stability of your HTPLA parts!!!
Looking for increased heat resistance without the need to switch to ABS? Protopasta High Temperature PLA offers heat deflection of up to 88° C (190.4° F) compared to standard PLA of 45-54° C (113-135° F). This makes it a great choice for moving parts (gears, RepRap pieces, etc) or prints that would face moderately high temperatures. Our High Temperature PLA is white, but can be painted after annealing.
We've created this page to bring you a premium PLA and HTPLA printing experience that rivals our premium material. Follow below to improve your 3D printing experience. In other words, here's your shortcut to awesomeness with pasta. If at the end of this document you have questions or need assistance, please contact us at [email protected].
Loose coils can be very tricky to manage. Going cowboy on your spool handling can quickly end up in a frustrating, tangled mess. Keep your loose coils wrangled with a spool holder like masterspool for a more trouble-free experience. Find out more about loose coil handling in Keith's blog post.
And for spooled filament, never let go of the loose end. When not in the printer extruder, tuck it away in the cardboard spool's corrugation! Also, avoid sharp bends and excessive force when loading filament into your printer.
At Proto-pasta, we make high quality filament. We aspire to make exceptional results easy, but a positive result is very much dependent on your hardware, set-up, adjustments, and process parameters. Matching hardware with process and material for a positive experience is not always straight-forward, but you can start by pairing the following settings with your printer for a good starting point, then tune or troubleshoot as required.
Volume flow rate together with temperature dictates how melted the material is. This is hardware & condition dependent based on hot end, nozzle & extruder type, material & manufacturer as well as layer fan type, position & settings. Extrusion width, layer thickness & speed changes affect volume flow which may change required/desired temperature.
Post your prints & tag us @Proto_pasta on Twitter and Instagram. Need more help? Consider typical pitfalls and fixes below.
We visited Joel and ended up with a helpful video on the subject:
Para uma correcta manutenção da sua impressora 3D, recomendamos sempre que trocar de material de filamento 3D, a efectuar uma purga com filamento especial de limpeza.
Desta forma garante que não ficam vestígios de material nas paredes do nozzle, evitando o acumular de crosta que é criado sempre que efectua trocas de material.
Com este produto evita problema como "clogs" e "jams" e fará com que o seu nozzle mantenha-se sempre limpo, durando muito mais tempo.
Poderá encontrar a partir de 1.49€ no seguinte LINK
Para obter maior aderência à superfície da sua impressora 3D recomendamos a aplicar 3DLAC na base da plataforma.
Poderá encontrar no seguinte LINK
Este material é altamente higroscópico, absorvendo rapidamente a humidade do ar passados poucos minutos após aberto, impossibilitando desta forma a correcta impressão 3D do mesmo. O resultado das impressões 3D de materiais com humidade tendem a ser frágeis e de acabamento irregular ou em certos casos, torna-se simplesmente impossíveis de imprimir.
Deverá de usar soluções de caixas fechadas com dessecante como sílica ou caixas próprias secadoras de filamento.
Poderá encontrar no seguinte LINK
Download:
Technical and Safety Data Sheet
500g- Rolo
HTPLA Nebula Multicolor HTPLA- Cor
1.75mm (+-0.05mm) - Espessura / Tolerância de diâmetro
Muito Fácil - Facilidade de Impressão
ProtoPasta é uma empresa situada nos Estados Unidos da América, de produção de filamentos para impressão 3D de alta qualidade.
Caracterizada pelos rolos feitos em cartão, esta marca é mundialmente famosa por ser especializada em materiais como PLA e ABS modificados com outros materiais, como o PLA Magnético; o PLA Condutivo; PLA de fibra de carbono; HTPLA de cobre, latão ou bronze; ou o ABS-PC.
Designed by Protopasta Filament-making Workshop attendee Ben Nickles and voted "favorite " by the attendees, I introduce to you Blue Wonder Glitter Flake HTPLA .
On July 21st, our workshop attendees got first access to our new gold and multi-color glitter flake concentrate during our first ever filament-making workshop!
Ben seized the day in designing this one-of-a-kind metallic blue PLA filament and everyone loved it so much that we agreed to release it, commemorating the experience.
Other than being an original creation, you might wonder how this blue is different than others? Well, it's translucent and has big multi-color flecks!
For this improved the performance, your prints should be baked in an oven until you see a change from translucent to opaque with reduced gloss. This visual change indicating the improved performance! We've seen the change take place in 5-10 minutes on thin walled parts but can take an hour or more. We've had good luck in a quality, at home convection oven at 110C (225F). Parts will get very "floppy" before becoming more firm, so please leave supports on your parts or support them and bake them on a flat, non-radiating surface (like glass, ceramic, or composite).
No abrasive fillers so expect normal wear with standard nozzles.
In our experience, good results were achieved using standard PLA parameters ranging from 195-225C nozzle with standard build surface preparation (blue tape, glue stick, or BuildTak). No heated bed required but up to 60C is okay. Beware, if the bed temperature is too high, your part base could actually heat treat while printing, increasing warping and decreasing adhesion. Some shrinkage will occur in the heat treating process, so dimension critical parts may need to be scaled appropriately (as much as 2.5% in our experience).
Looking for increased heat resistance without the need to switch to ABS? Protopasta High Temperature PLA offers heat deflection of up to 88° C (190.4° F) compared to standard PLA of 45-54° C (113-135° F). This makes it a great choice for moving parts (gears, RepRap pieces, etc) or prints that would face moderately high temperatures. Our High Temperature PLA is white, but can be painted after annealing.
We've created this page to bring you a premium PLA and HTPLA printing experience that rivals our premium material. Follow below to improve your 3D printing experience. In other words, here's your shortcut to awesomeness with pasta. If at the end of this document you have questions or need assistance, please contact us at [email protected].
Loose coils can be very tricky to manage. Going cowboy on your spool handling can quickly end up in a frustrating, tangled mess. Keep your loose coils wrangled with a spool holder like masterspool for a more trouble-free experience. Find out more about loose coil handling in Keith's blog post.
And for spooled filament, never let go of the loose end. When not in the printer extruder, tuck it away in the cardboard spool's corrugation! Also, avoid sharp bends and excessive force when loading filament into your printer.
At Proto-pasta, we make high quality filament. We aspire to make exceptional results easy, but a positive result is very much dependent on your hardware, set-up, adjustments, and process parameters. Matching hardware with process and material for a positive experience is not always straight-forward, but you can start by pairing the following settings with your printer for a good starting point, then tune or troubleshoot as required.
Volume flow rate together with temperature dictates how melted the material is. This is hardware & condition dependent based on hot end, nozzle & extruder type, material & manufacturer as well as layer fan type, position & settings. Extrusion width, layer thickness & speed changes affect volume flow which may change required/desired temperature.
Post your prints & tag us @Proto_pasta on Twitter and Instagram. Need more help? Consider typical pitfalls and fixes below.
We visited Joel and ended up with a helpful video on the subject:
Para uma correcta manutenção da sua impressora 3D, recomendamos sempre que trocar de material de filamento 3D, a efectuar uma purga com filamento especial de limpeza.
Desta forma garante que não ficam vestígios de material nas paredes do nozzle, evitando o acumular de crosta que é criado sempre que efectua trocas de material.
Com este produto evita problema como "clogs" e "jams" e fará com que o seu nozzle mantenha-se sempre limpo, durando muito mais tempo.
Poderá encontrar a partir de 1.49€ no seguinte LINK
Para obter maior aderência à superfície da sua impressora 3D recomendamos a aplicar 3DLAC na base da plataforma.
Poderá encontrar no seguinte LINK
Este material é altamente higroscópico, absorvendo rapidamente a humidade do ar passados poucos minutos após aberto, impossibilitando desta forma a correcta impressão 3D do mesmo. O resultado das impressões 3D de materiais com humidade tendem a ser frágeis e de acabamento irregular ou em certos casos, torna-se simplesmente impossíveis de imprimir.
Deverá de usar soluções de caixas fechadas com dessecante como sílica ou caixas próprias secadoras de filamento.
Poderá encontrar no seguinte LINK
Download:
Technical and Safety Data Sheet
500g- Rolo
HTPLA Wonder Blue HTPLA with Multi-color Glitter ( Community Inspired ) - Cor
1.75mm (+-0.05mm) - Espessura / Tolerância de diâmetro
Muito Fácil - Facilidade de Impressão


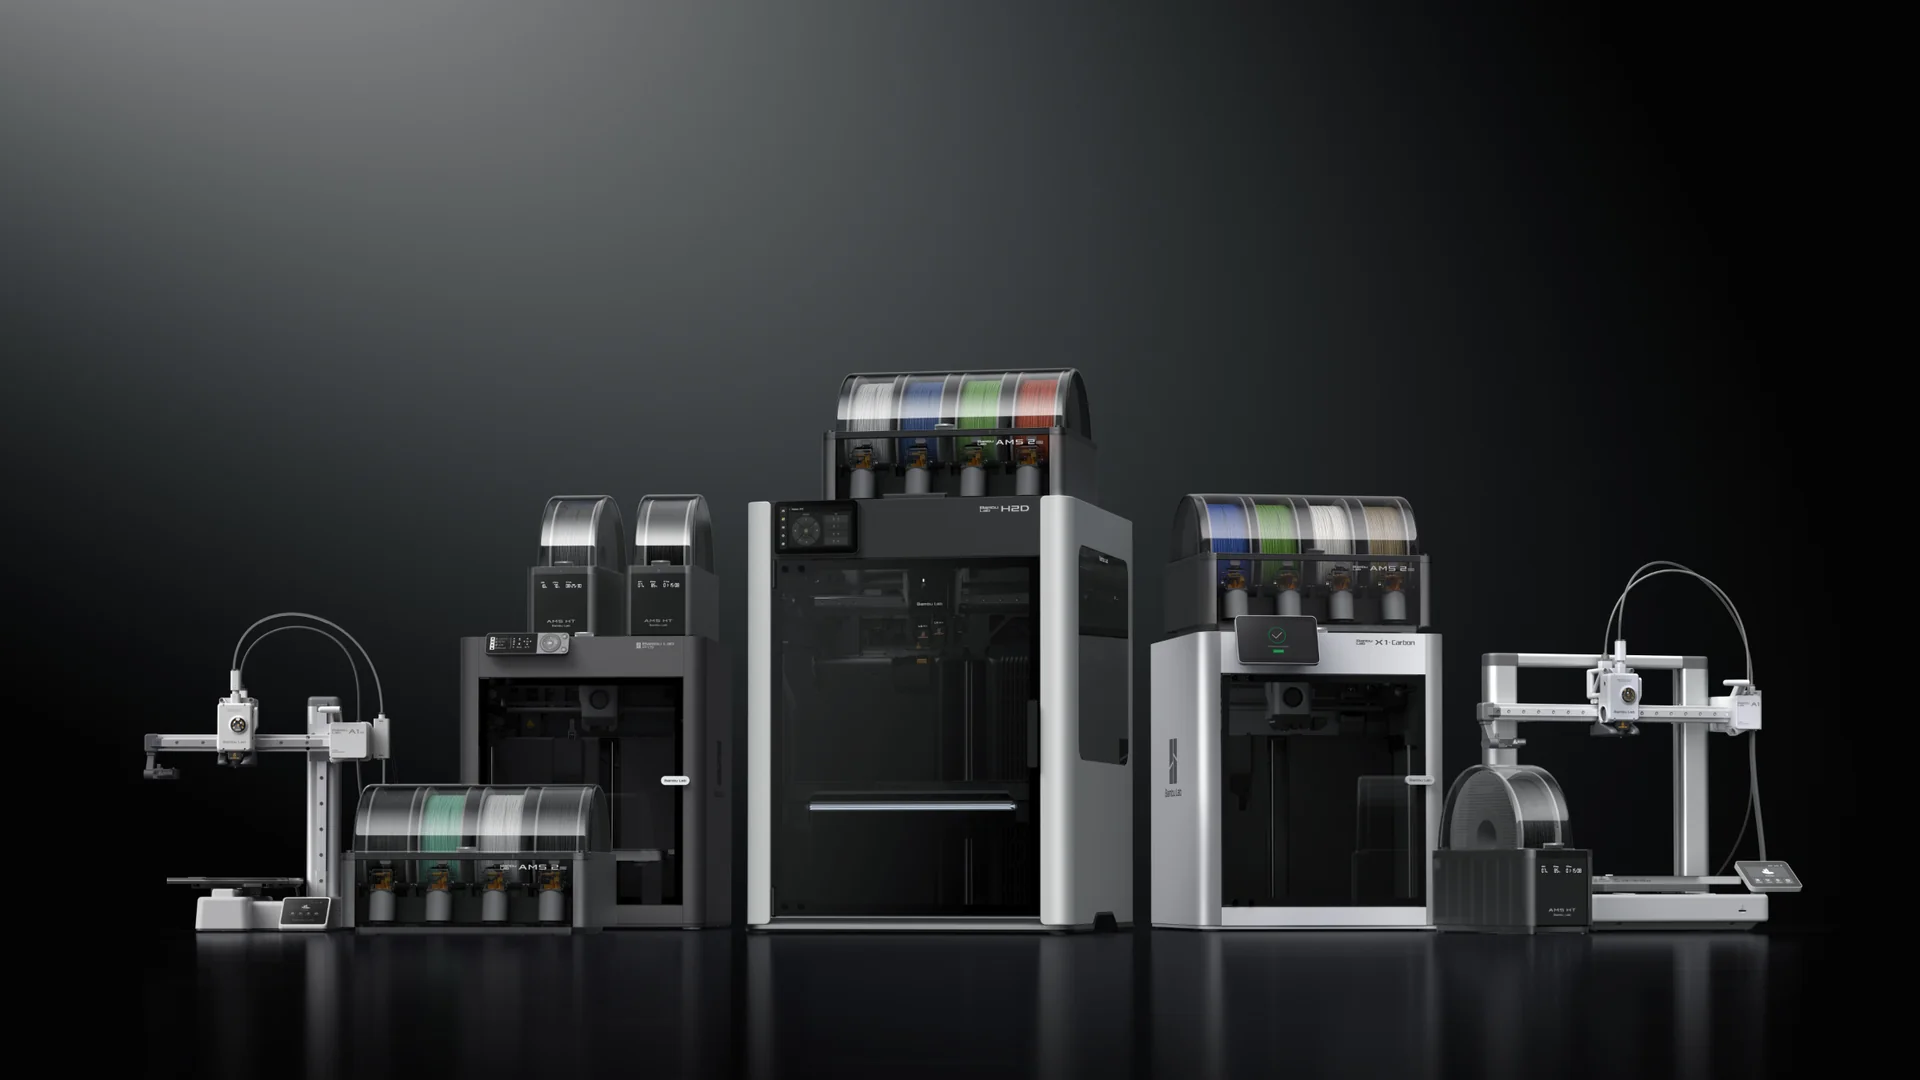
24 Cores / Materiais
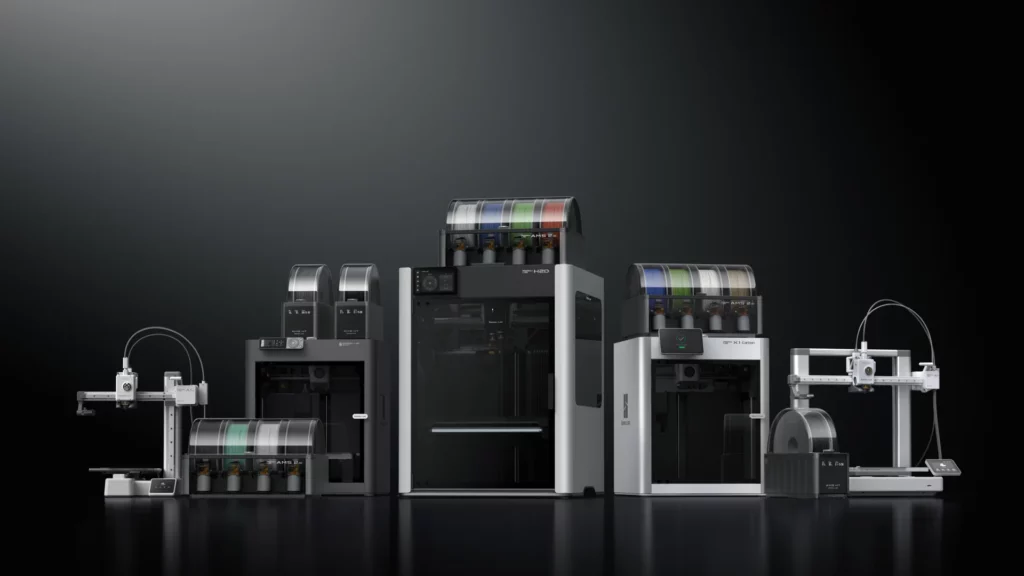
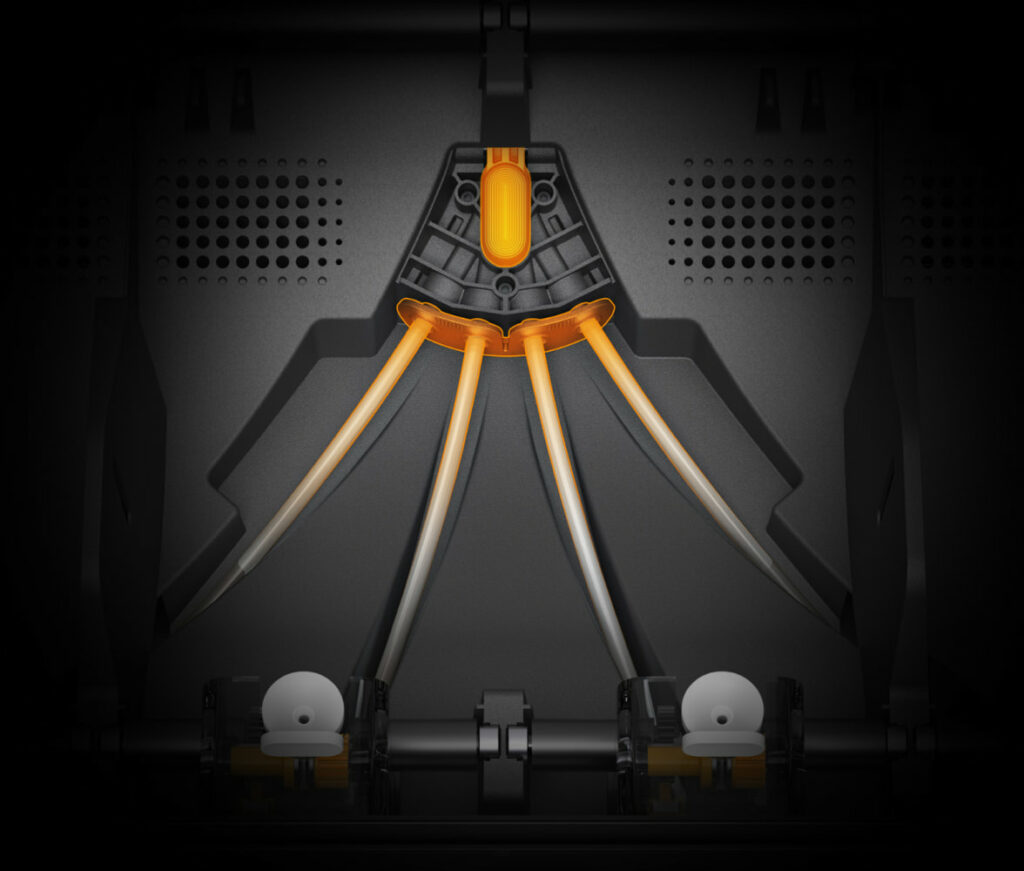
Ligação em série até 4 AMS 2 Pro e 8 AMS HT, num total de 24 filamentos
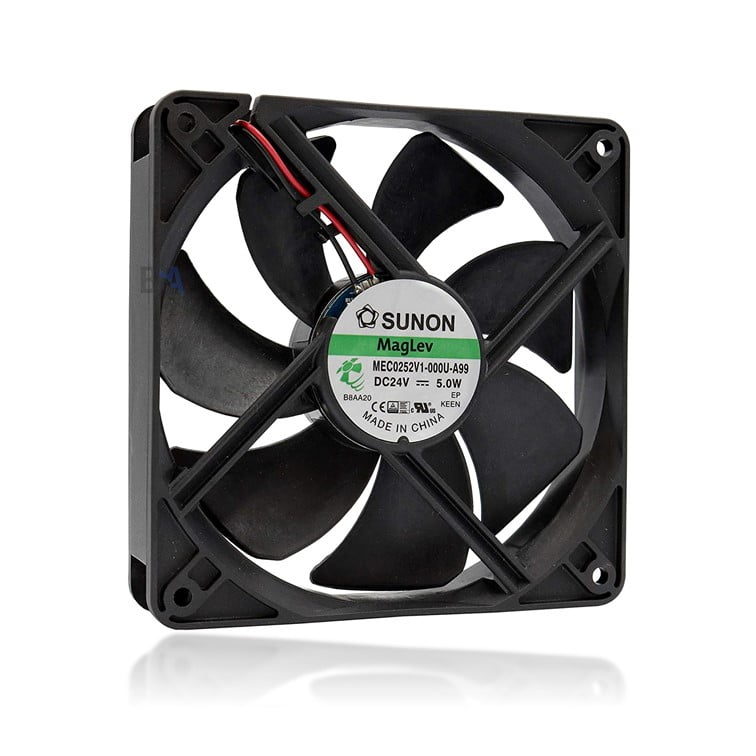
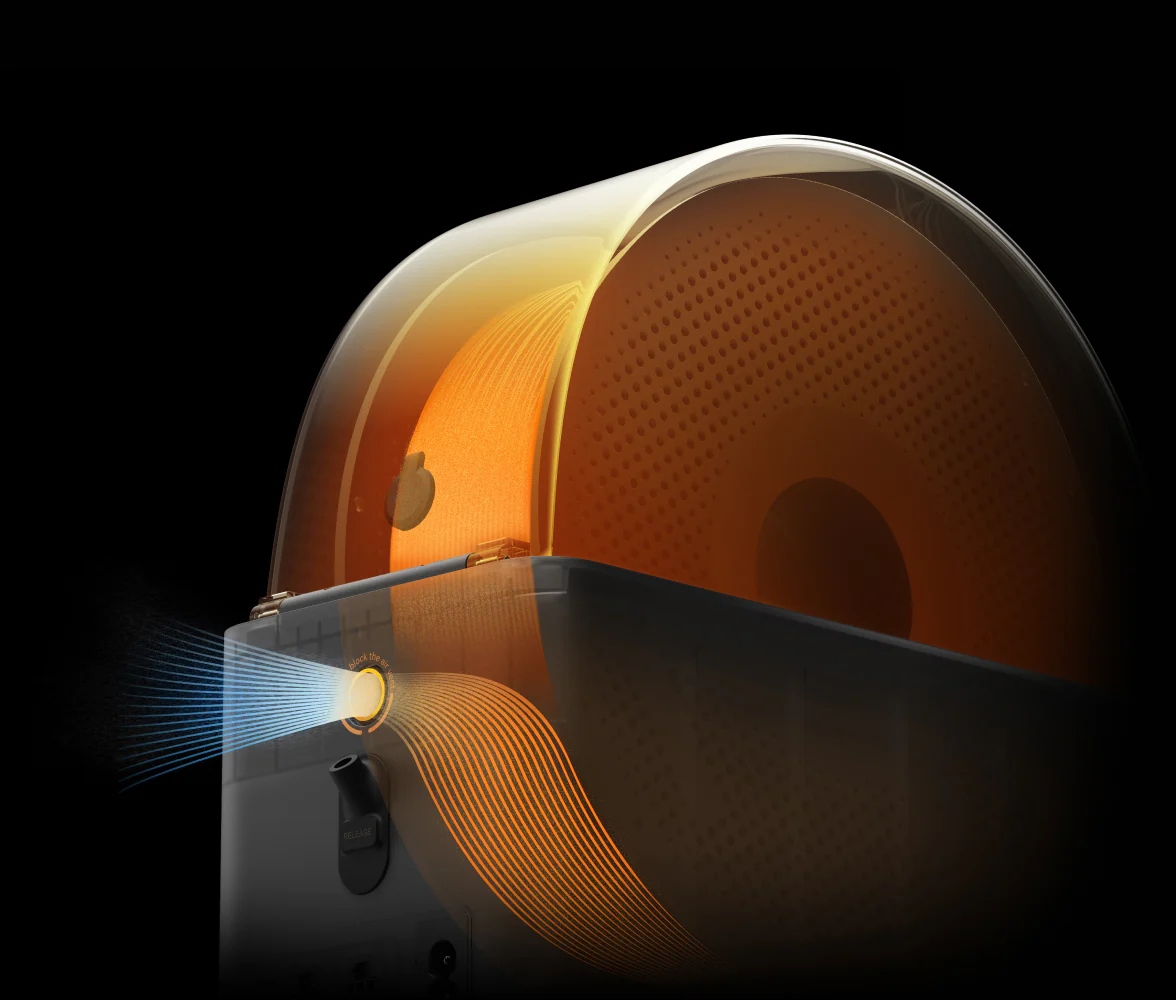
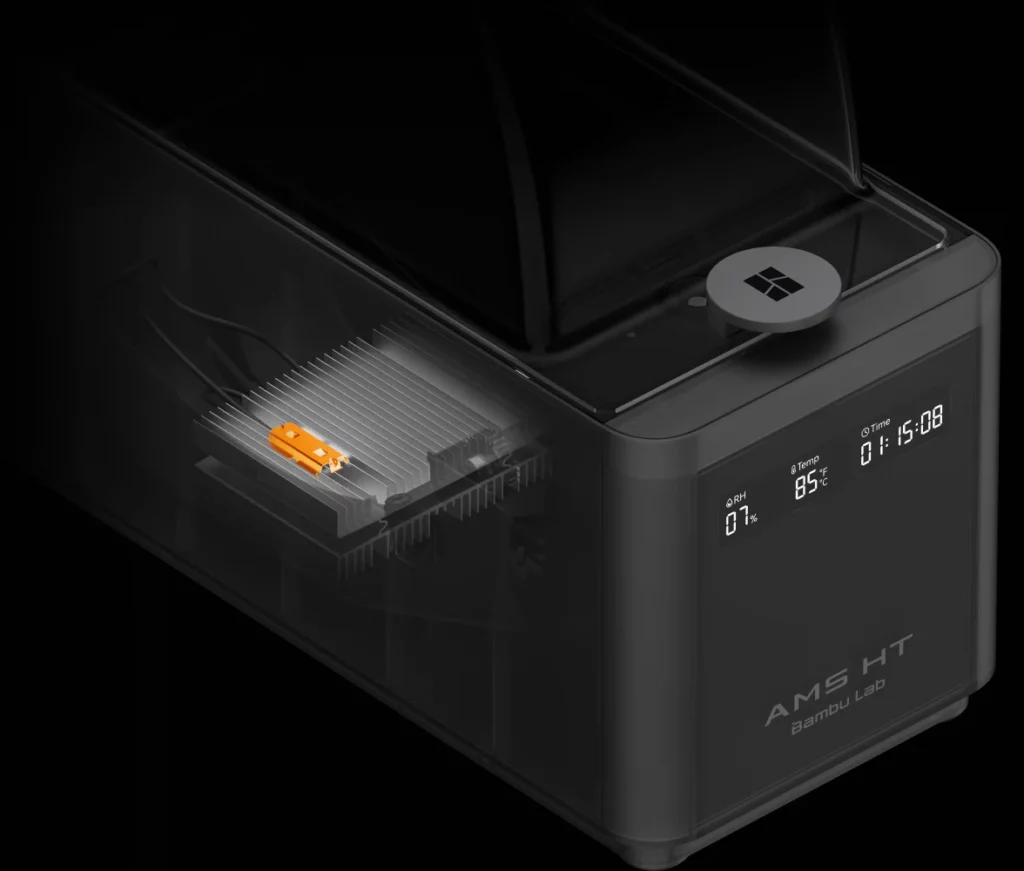
Ventilação Eletromagnética
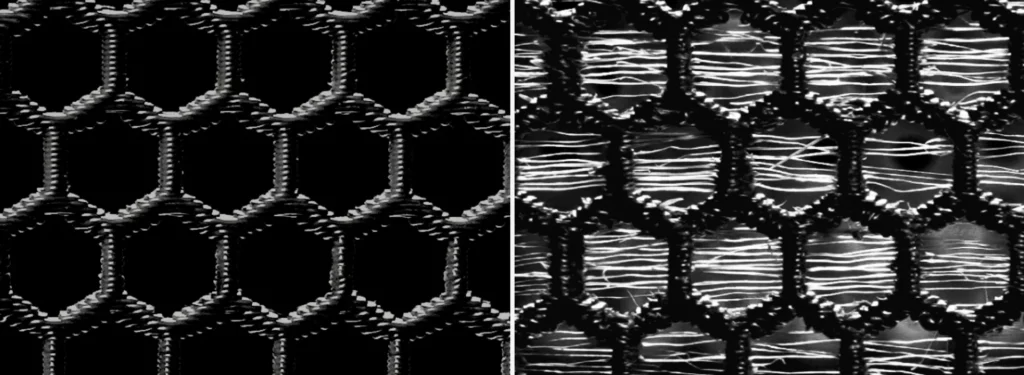
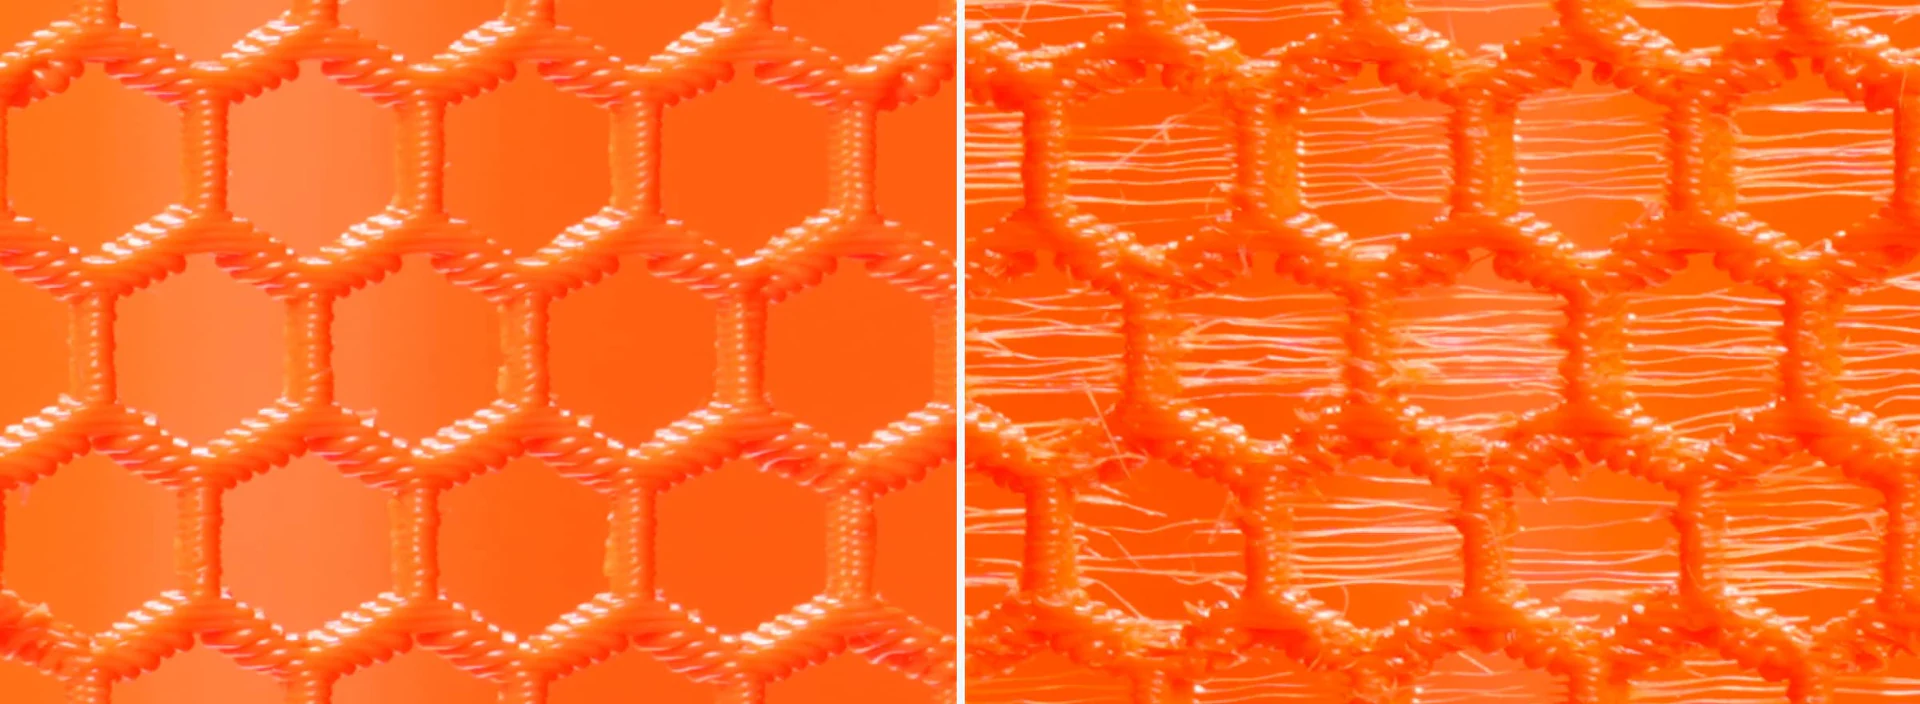
Secagem rápida de filamento e armazenamento hermético
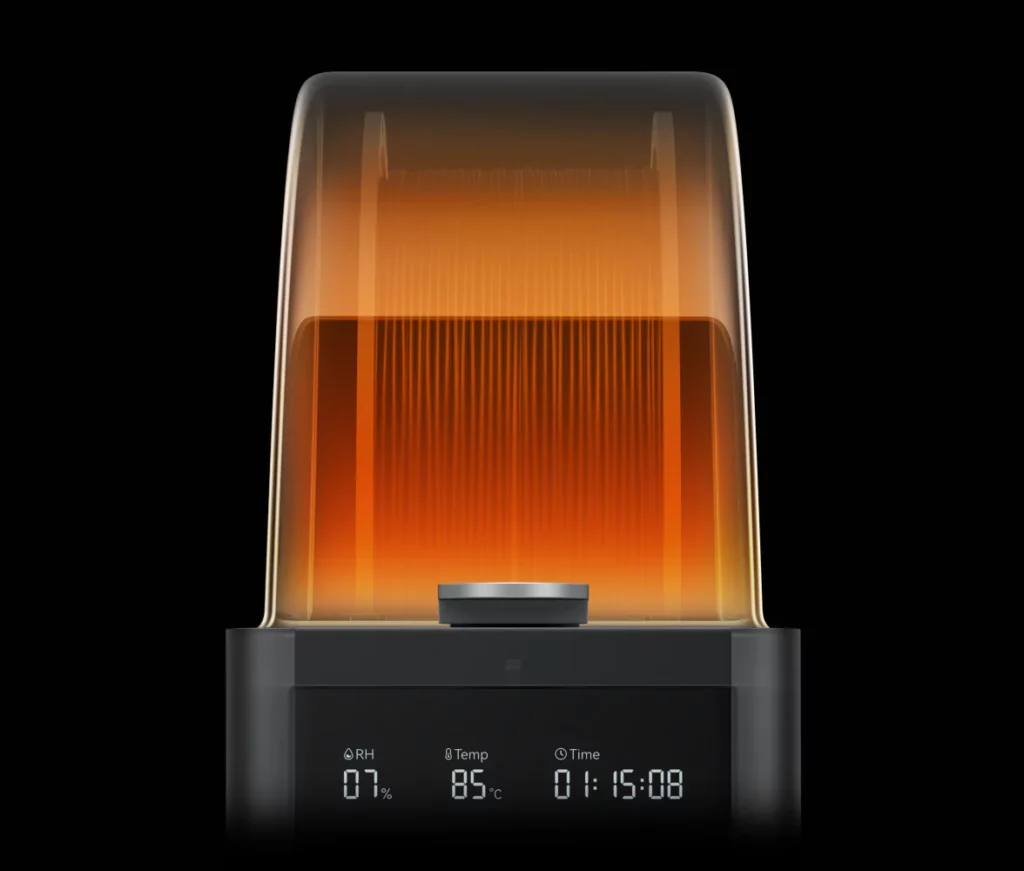
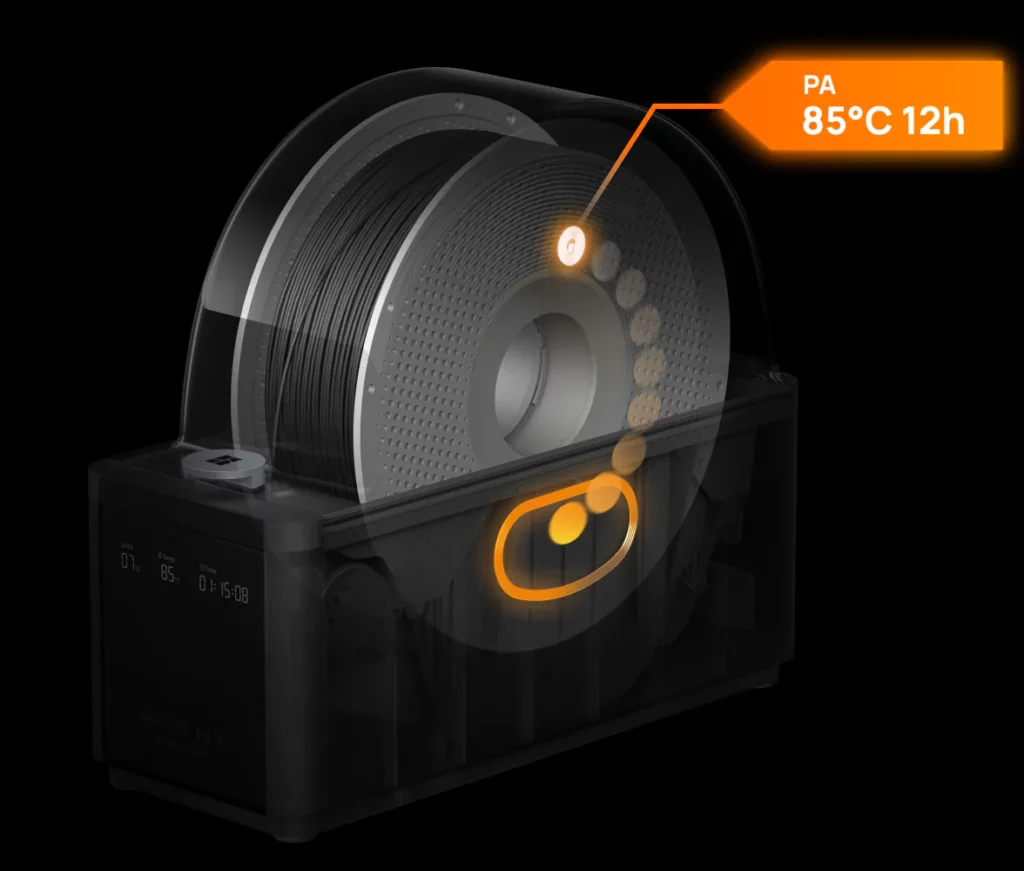
Temperatura de Secagem a 85 °C
Especialmente concebido para secagem de filamentos de alta performance
Motor Sem Escovas
Velocidade de alimentação 60% mais rápida
Ventilação Ativa com Secagem de Filamento a 85 °C
Armazenamento Hermético de Filamento
Impressão Multimaterial / até 24 Cores
Motor de Alimentação Servo Sem Escovas
Sincronização de Filamento via RFID
Compatibilidade com AMS HT para impressoras X1/P1 será adicionada através de atualização OTA até ao final de abril
Compatibilidade com AMS HT para impressoras A1/A1 mini será adicionada através de atualização OTA no 3.º trimestre de 2025
Bambu PET-CF

| Item | Especificação |
|---|---|
| Corpo | |
| Dimensões | 114×280×245 mm³ |
| Peso Líquido | 1.21 kg |
| Material da Estrutura | PC/PA |
| Classe de Retardante de Chama | UL 94 V-0 |
| Ecrã | Suporta visualização em tempo real de temperatura, humidade e duração restante de secagem. |
| Impressão | |
| Filamentos Suportados | PLA, PETG, ABS, ASA, PET, PA, PC, PVA (seco), BVOH (seco), PP, POM, HIPS, PLA-CF/PAHT-CF/PETG-CF da Bambu / Suporte para PLA/PETG e TPU para AMS. Saída de Desvio de Filamento: TPE, TPU genérico, PET-CF/TPU 95A da Bambu, e outros filamentos com fibras de carbono ou de vidro. |
| Filamentos Não Suportados | PVA (húmido), BVOH (húmido) |
| Diâmetro do Filamento | 1.75 mm |
| Dimensões da Bobina | Largura: 50 mm–68 mm Diâmetro: 197 mm–202 mm |
| Identificação RFID | Suportado |
| Odómetro de Filamento | Suportado |
| Secagem | |
| Temperatura Máxima | 85 °C |
| Filamentos Suportados | PLA, PETG, Suporte para PLA/PETG, ABS, ASA, PET, PA, PC, PVA, BVOH, PP, POM, HIPS, PLA-CF/PAHT-CF/PETG-CF da Bambu, e TPU para AMS |
| Descarga Activa de Humidade | Suportado |
| Modo de Secagem com Rotação | Suportado |
| Armazenamento Selado | Suportado |
| Deteção de Tampa Superior Aberta | Suportado |
| Deteção e Manutenção de Temperatura e Humidade | Suportado. A informação em tempo real pode ser exibida no ecrã, interface da impressora, app Bambu Studio e Bambu Handy. |
| Voltagem | DC: 24 V AC: 100 V–240 V~, 50 Hz/60 Hz |
| Potência Média | 150 W |
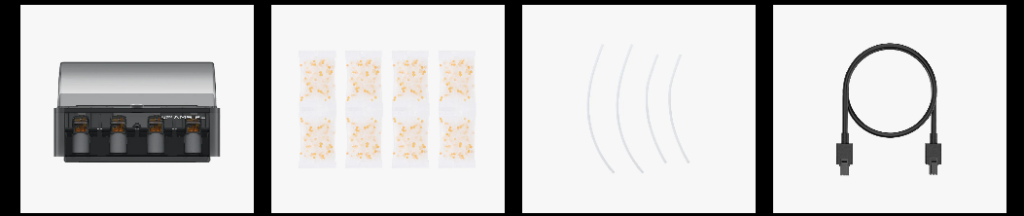
Bambu AMS HT, Dessecante, Tubo PTFE, Cabo Bambu Bus – 6 Pinos
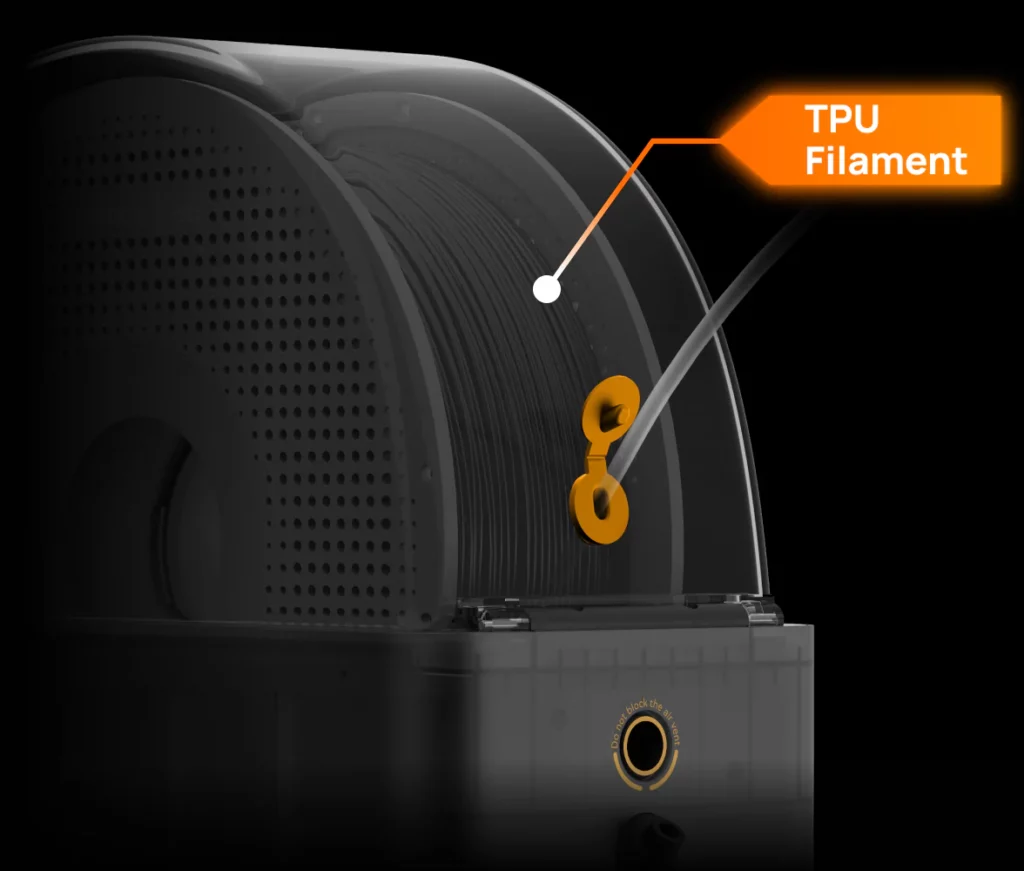
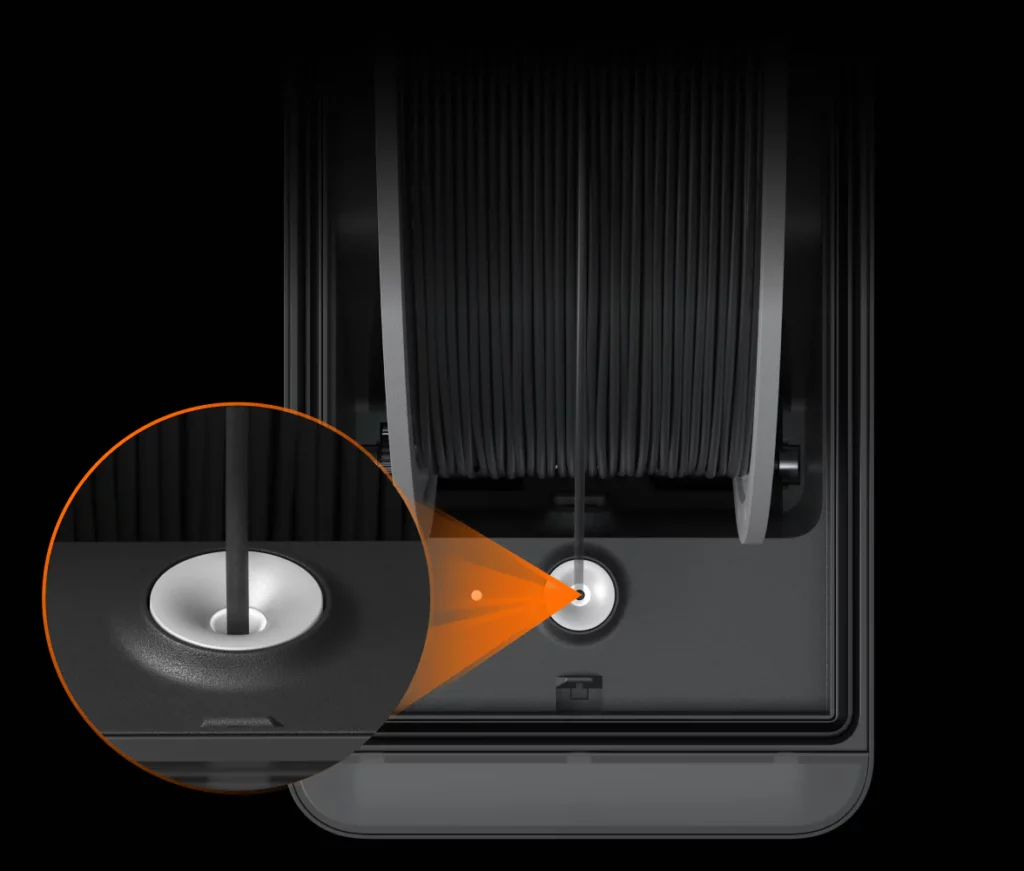
A porta na parte traseira da tampa superior é especificamente para filamento TPU. Devido à sua suavidade, o filamento TPU pode falhar facilmente quando se utiliza a função de alimentação automática do AMS 2 Pro. Ao utilizar TPU, insira-o no AMS HT e certifique-se de que a bandeja de material roda na direção correta. Introduza o tubo de material na porta de saída de TPU e empurre manualmente o filamento através do tubo de PTFE até que esteja totalmente carregado no extrusor.
Nota: Ao utilizar TPU, o AMS HT não pode utilizar a função de alimentação e retorno automáticos, mas pode ser usado como caixa de secagem para evitar a absorção de humidade pelo material.
A compatibilidade do AMS HT com as impressoras das séries X1 e P1 será adicionada através de uma atualização OTA até ao final de abril.
Se estiveres a ligar apenas um AMS HT a uma impressora da série X ou P, será necessário adquirir separadamente um buffer de filamento.
Se ligares várias unidades AMS HT, recomenda-se a compra de um AMS Hub.
A compatibilidade do AMS HT com as impressoras A1 e A1 mini será adicionada através de uma atualização OTA no 3.º trimestre de 2025.
Imprimir enquanto seca ainda não é suportado, incluindo todos os AMS associados ao trabalho de impressão em curso (por exemplo, os AMS atribuídos para reabastecimento automático). No entanto, é possível secar filamento nos AMS que não estejam atribuídos ao trabalho de impressão em curso.
As impressoras das séries X1 e P1 suportam até 4 ligações AMS HT em simultâneo.
As impressoras das séries H2D e X/P/A ligam-se ao AMS HT para utilizar a função de secagem. Cada AMS HT requer uma fonte de alimentação externa de 220 V para a secagem.
Não é suportada a alimentação elétrica a partir da impressora para essa função (o adaptador de corrente está incluído na embalagem do produto).
Ao utilizar a função de secagem do AMS HT, este deve estar ligado à impressora através de um cabo bus de 6 pinos para garantir que a impressora está ligada e configurada no modo de secagem de filamento.
O AMS HT não pode realizar a secagem de forma autónoma sem estar ligado à impressora.
* Aviso Importante:
Esta impressora 3D é considerada como um equipamento de desgaste rápido.
Este equipamento é comercializado em kit, sendo necessário conhecimento de montagem, manutenção e operação por parte do utilizador.
A manutenção regular e a substituição de peças desgastadas são essenciais para garantir o funcionamento eficiente e a longevidade da impressora 3D.
A compra deste produto requer conhecimento da língua inglesa, uma vez que as bases de dados, os termos técnicos e o software associado estão disponíveis exclusivamente em inglês.
Partilhamos os termos de garantia limitada e específica deste equipamento, onde poderá encontrar as peças de desgaste rápido (3 meses de garantia) e peças consideradas como consumíveis (sem garantia) :
https://bambulab.com/en/policies/warranty
A Evolt concede a garantia legal de 3 anos em todos os componentes que não sejam classificados como peças de desgaste ou consumíveis.
Qualquer necessidade de activação da garantia seguirá o processo de diagnóstico à distância realizado pela Evolt. Após validação e aprovação pelo fabricante Bambu Lab, as peças necessárias para a reparação serão enviadas, acompanhadas dos respectivos manuais de reparação. Em caso de necessidade a Evolt disponibiliza de serviços adicionais como formação e assistência profissional premium.
Em caso de dúvidas, sugerimos que contacte a nossa equipa em primeiro lugar.
Qualquer sinal de uso inviabiliza a possibilidade de devolução do equipamento.
Este produto é acompanhado por manuais e informações online disponibilizadas pelo fabricante: https://wiki.bambulab.com/en/home
Problemas relacionados com entupimentos ou quebras causadas por descuido ou ignorância por parte do utilizador durante o manuseamento do equipamento não estão cobertos pela garantia.
Qualquer manipulação ou substituição de peças por parte do utilizador sem autorização da nossa equipa anula a garantia. Este produto não inclui qualquer tipo de serviço de suporte/assistência técnica, manutenção ou formação sobre como operar o equipamento ou realizar impressões 3D.
Qualquer necessidade de serviços prestados pela nossa equipa terá um custo adicional por hora ou será orçamentada previamente.
Ao comprar, o cliente confirma que compreende e aceita estas condições.
É perfeitamente normal no mundo da impressão 3D os utilizadores encontrarem dificuldades, quer a nível profissional, quer como hobby. Esta probabilidade aumenta à medida que os projetos se tornam mais complexos e a documentação é menos abrangente.
É por isso que recomendamos aos utilizadores, independentemente da sua experiência, que se juntem a comunidades de entusiastas, como a Bambu Lab Portugal e Impressão 3D Portugal, onde podem partilhar os seus projetos, solicitar assistência e certamente encontrar outros utilizadores que partilham configurações semelhantes, que já enfrentaram dúvidas semelhantes e podem prestar auxílio.
Devido às dimensões e aos encargos logísticos envolvidos, não realizamos entregas em mão nem disponibilizamos recolha no nosso Pickup 24/7. Apenas disponibilizamos a opção de envio.

24 Cores/Multi-material
Ventilação Eletromagnética
Secagem a 65°C
Motor sem escovas
Velocidade de alimentação 60% mais rápida
O AMS 2 Pro é compatível com impressoras das séries X1/P1 para impressão multi-material. A funcionalidade de secagem de filamento para essas impressoras de geração anterior será disponibilizada por meio de uma atualização OTA até o final de abril.

Bambu PETG Basic


| Item | Especificação |
|---|---|
| Corpo | |
| Dimensões | 372×280×226 mm³ |
| Peso Líquido | 2.5 kg |
| Material da Carcaça | ABS/PC |
| Impressão | |
| Filamento Suportado | PLA, PETG, ABS, ASA, PET, PA, PC, PVA (seco), BVOH (seco), PP, POM, HIPS, Bambu PLA-CF/PAHT-CF/PETG-CF (para AMS) |
| Filamento Não Suportado | TPE, TPU genérico, PVA (úmido), BVOH (úmido), Bambu PET-CF/TPU 95A, e outros filamentos que contenham fibra de carbono ou fibra de vidro |
| Diâmetro do Filamento | 1.75 mm |
| Dimensão do Suporte de Bobina | Largura: 50 mm-68 mm; Diâmetro: 197 mm-202 mm |
| Identificação RFID | Suportado |
| Temperatura Máxima | 65 °C |
| Secagem | |
| Filamento Suportado | PLA, PETG, Suporte para PLA/PETG, ABS*, ASA*, PET*, PA*, PC*, PVA*, BVOH*, PP, POM*, HIPS*, Bambu PLA-CF*/PAHT-CF*/PETG-CF* e TPU para AMS* |
| Descarga Ativa de Umidade | Suportado |
| Armazenamento Vedado | Suportado |
| Detecção e Manutenção de Temperatura e Umidade | Suportado. Temperatura e umidade em tempo real podem ser exibidas na tela, Bambu Studio e Bambu Handy. |
| Energia | |
| Entrada | 24 V 4 A |
Os filamentos marcados com * requerem uma temperatura de secagem mais alta. O AMS 2 Pro não consegue secá-los completamente. Se desejares um desempenho de secagem melhor para esses filamentos, recomendamos a compra de um AMS HT.
Bambu AMS 2 Pr, Dessecante, Tubo PTFE, Cabo Bambu Bus - 6 Pinos
Quando o H2D é utilizado com um único AMS 2 Pro, todas as funções, incluindo alimentação automática e secagem, podem ser utilizadas sem a necessidade de um adaptador de alimentação externo.
Quando o H2D é utilizado com mais de um AMS 2 Pro, se algumas unidades do AMS 2 Pro forem usadas para impressão em múltiplas cores, enquanto outras são usadas para secagem de filamento, as unidades AMS 2 Pro usadas para secagem exigem um adaptador de alimentação externo. O adaptador de alimentação externo pode ser adquirido na loja oficial da Bambu Lab.
As impressoras das séries X1 e P1 são compatíveis com o AMS 2 Pro. Se for utilizado apenas a função de alimentação automática de filamento, são necessários apenas o cabo de barramento de 6 pinos, o cabo de barramento de 4 pinos e o Filament Buffer/AMS Hub, sem necessidade de adaptador de alimentação externo. No entanto, se for necessário usar a função de secagem, um adaptador de alimentação externo será necessário para o AMS 2 Pro.
Todos os acessórios podem ser adquiridos no kit de atualização da seção de acessórios do AMS 2 Pro.
O AMS 2 Pro é compatível com as impressoras das séries X1/P1 para impressão multi-material. A funcionalidade de secagem de filamento para essas máquinas de geração anterior será disponibilizada por meio de uma atualização OTA até o final de abril.
Sim, podes usar tanto o AMS quanto o AMS 2 Pro em uma única H2D.
Atualmente, a secagem não é suportada para unidades AMS 2 Pro/HT que estão ativamente envolvidas no processo de impressão, incluindo aquelas que podem ser usadas para refil automático durante o trabalho de impressão atual. A impressão enquanto seca ainda não é suportada.
O único cenário de "secagem enquanto imprime" atualmente suportado é: a impressora usa algumas das unidades AMS 2 Pro/HT conectadas ou um suporte de bobina externo para impressão, enquanto as unidades AMS 2 Pro/HT não envolvidas no trabalho de impressão atual podem ser usadas para secagem.
Se a impressora estiver alimentando ou imprimindo, e ao mesmo tempo fornecendo energia para 1 AMS 2 Pro para secagem, a potência de secagem será automaticamente reduzida, a fim de garantir que a potência de impressão tenha prioridade. Portanto, recomenda-se usar o adaptador de alimentação externo para obter os melhores resultados de secagem.
A impressora H2D suporta alimentar uma unidade AMS 2 Pro para secagem diretamente da impressora. Se precisar de secar filamento em várias unidades AMS 2 Pro simultaneamente, as unidades adicionais AMS 2 Pro exigem um fornecimento de energia através de um adaptador de alimentação (vendido separadamente).
Ao usar a função de secagem do AMS 2 Pro, o AMS 2 Pro deve estar conectado à impressora através de um cabo de barramento de 6 pinos para garantir que a impressora esteja ligada e configurada no modo de secagem de filamento.
O AMS 2 Pro não pode realizar secagem de forma independente sem uma conexão com a impressora.
AMS Buffer
Bus cable
AMS 2 Pro Switching Adapter (transformador opcional, necessário apenas para secar o filamento)
PTFE Tube Coupler (3 pcs) - Bambu Lab
Bambu PTFE Tube (3pcs 370mm*1+550mm*2)
AMS Hub
Bus cable
AMS 2 Pro Switching Adapter (transformador opcional, necessário apenas para secar o filamento)
PTFE Tube Coupler (3 pcs) - Bambu Lab
Bambu PTFE Tube (3pcs 370mm*1+550mm*2)
* Aviso Importante:
Esta impressora 3D é considerada como um equipamento de desgaste rápido.
Este equipamento é comercializado em kit, sendo necessário conhecimento de montagem, manutenção e operação por parte do utilizador.
A manutenção regular e a substituição de peças desgastadas são essenciais para garantir o funcionamento eficiente e a longevidade da impressora 3D.
A compra deste produto requer conhecimento da língua inglesa, uma vez que as bases de dados, os termos técnicos e o software associado estão disponíveis exclusivamente em inglês.
Partilhamos os termos de garantia limitada e específica deste equipamento, onde poderá encontrar as peças de desgaste rápido (3 meses de garantia) e peças consideradas como consumíveis (sem garantia) :
https://bambulab.com/en/policies/warranty
A Evolt concede a garantia legal de 3 anos em todos os componentes que não sejam classificados como peças de desgaste ou consumíveis.
Qualquer necessidade de activação da garantia seguirá o processo de diagnóstico à distância realizado pela Evolt. Após validação e aprovação pelo fabricante Bambu Lab, as peças necessárias para a reparação serão enviadas, acompanhadas dos respectivos manuais de reparação. Em caso de necessidade a Evolt disponibiliza de serviços adicionais como formação e assistência profissional premium.
Em caso de dúvidas, sugerimos que contacte a nossa equipa em primeiro lugar.
Qualquer sinal de uso inviabiliza a possibilidade de devolução do equipamento.
Este produto é acompanhado por manuais e informações online disponibilizadas pelo fabricante: https://wiki.bambulab.com/en/home
Problemas relacionados com entupimentos ou quebras causadas por descuido ou ignorância por parte do utilizador durante o manuseamento do equipamento não estão cobertos pela garantia.
Qualquer manipulação ou substituição de peças por parte do utilizador sem autorização da nossa equipa anula a garantia. Este produto não inclui qualquer tipo de serviço de suporte/assistência técnica, manutenção ou formação sobre como operar o equipamento ou realizar impressões 3D.
Qualquer necessidade de serviços prestados pela nossa equipa terá um custo adicional por hora ou será orçamentada previamente.
Ao comprar, o cliente confirma que compreende e aceita estas condições.
É perfeitamente normal no mundo da impressão 3D os utilizadores encontrarem dificuldades, quer a nível profissional, quer como hobby. Esta probabilidade aumenta à medida que os projetos se tornam mais complexos e a documentação é menos abrangente.
É por isso que recomendamos aos utilizadores, independentemente da sua experiência, que se juntem a comunidades de entusiastas, como a Bambu Lab Portugal e Impressão 3D Portugal, onde podem partilhar os seus projetos, solicitar assistência e certamente encontrar outros utilizadores que partilham configurações semelhantes, que já enfrentaram dúvidas semelhantes e podem prestar auxílio.
Devido às dimensões e aos encargos logísticos envolvidos, não realizamos entregas em mão nem disponibilizamos recolha no nosso Pickup 24/7. Apenas disponibilizamos a opção de envio.
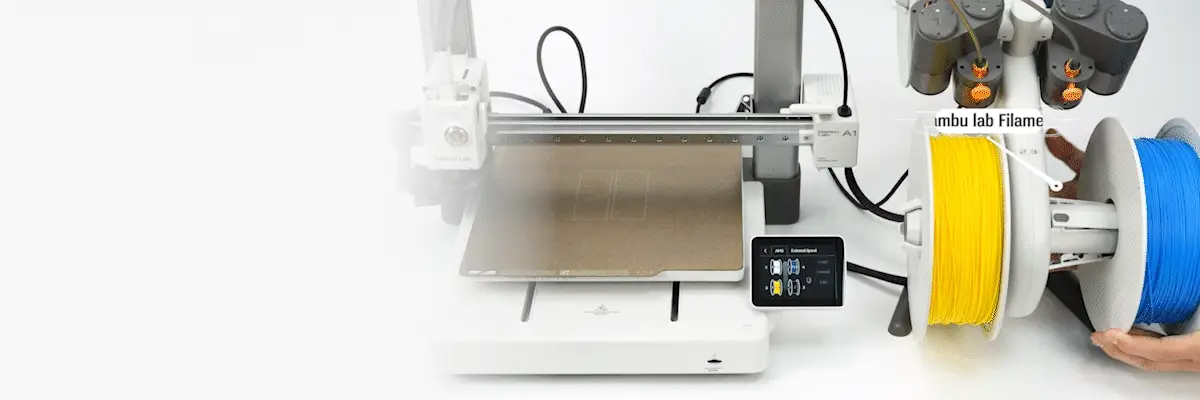
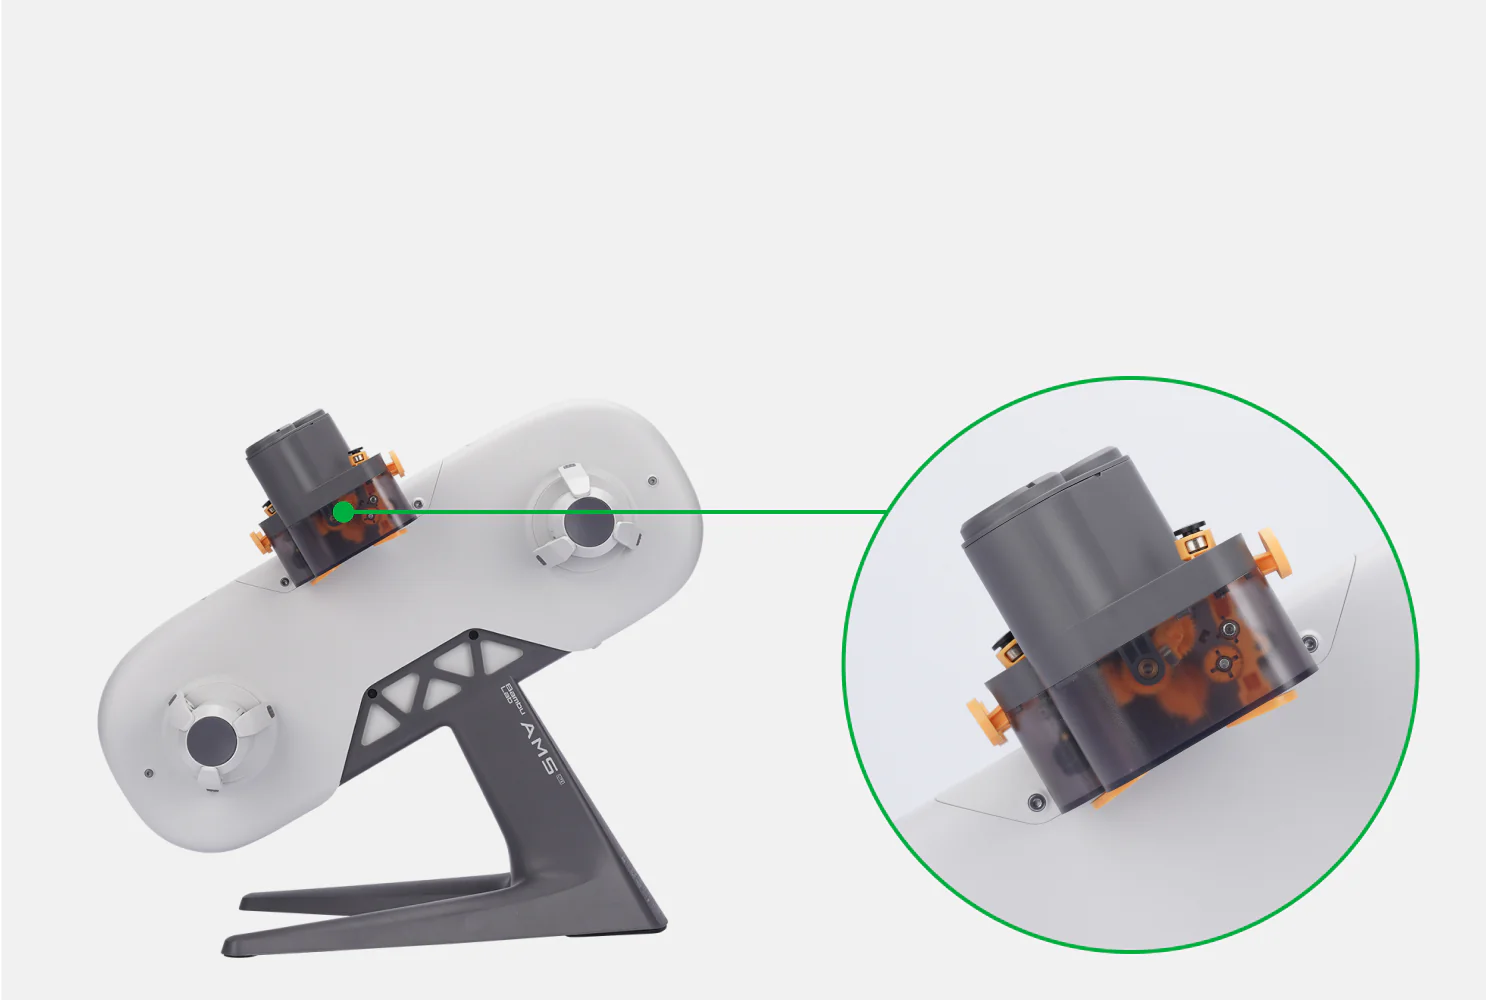
- O Bambu Lab AMS Lite é um sistema inteligente que comunica com a impressora A1 e A1 Mini de forma a garantir uma alimentação suave e comutação automática do filamento de impressão média.
Pode detectar a tensão no filamento e ajustar activamente o ritmo de alimentação. Com tecnologia RFID, o Bambu Lab AMS identifica o filamento carregado no interior e configura automaticamente as definições de impressão mais adequadas.
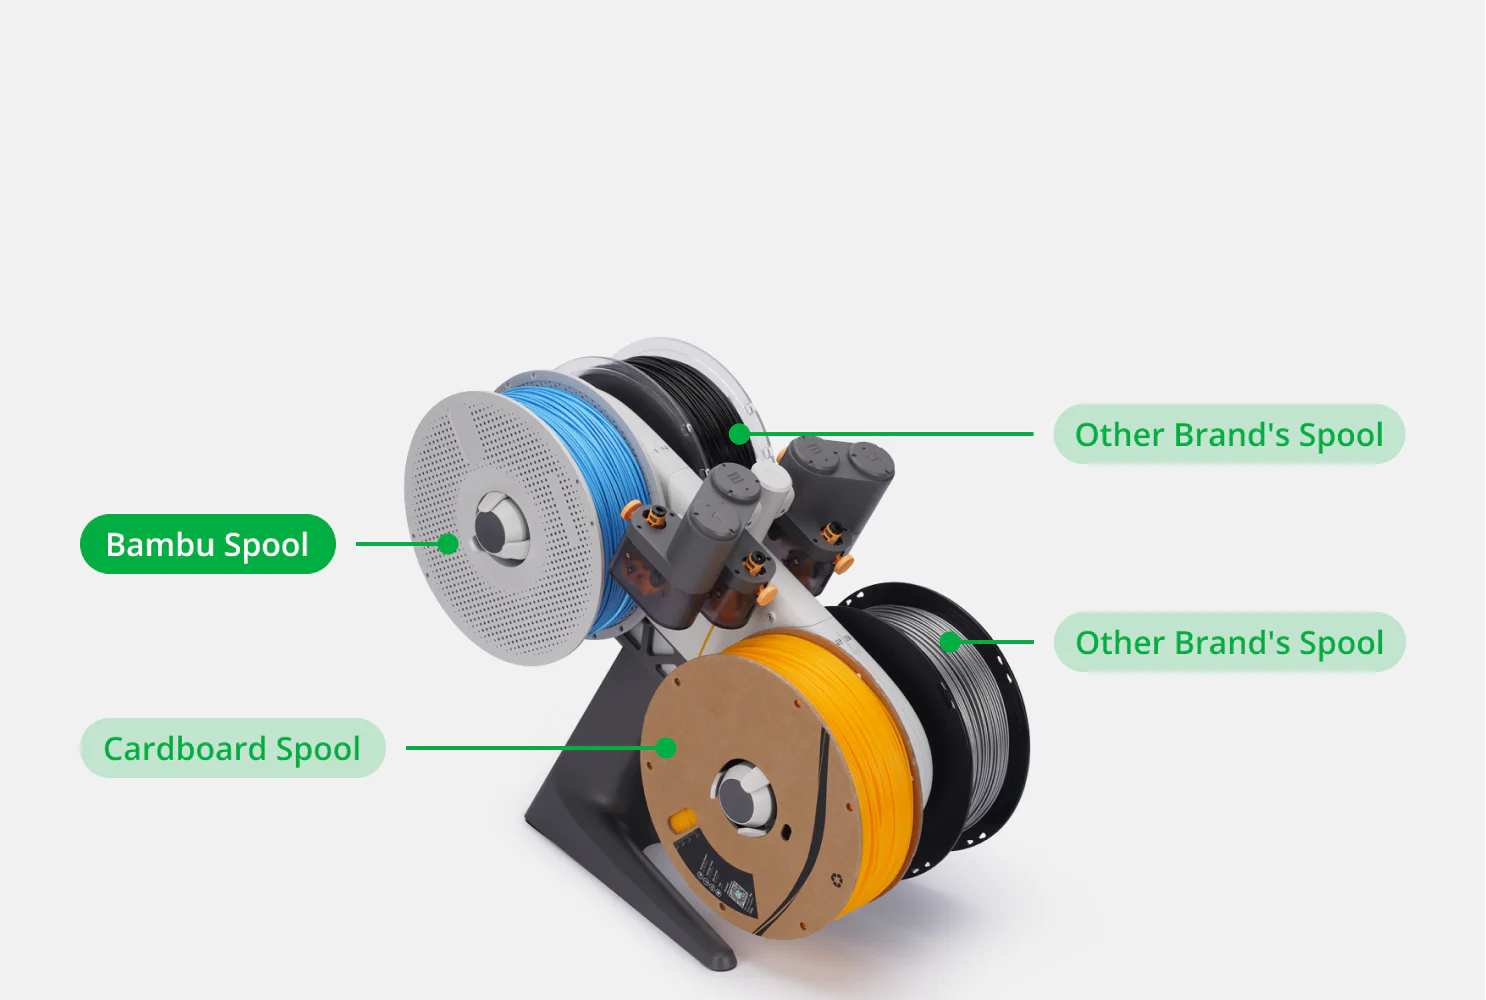
Suporta 4 filamentos de cores diferentes.
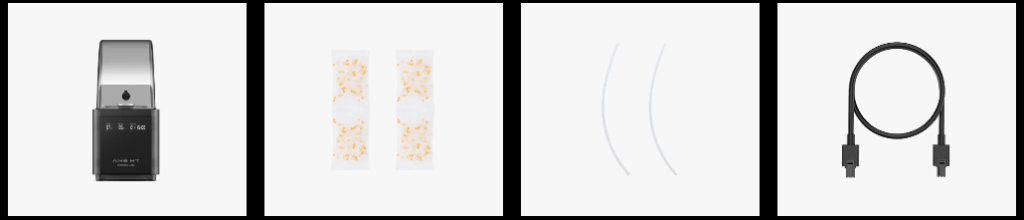
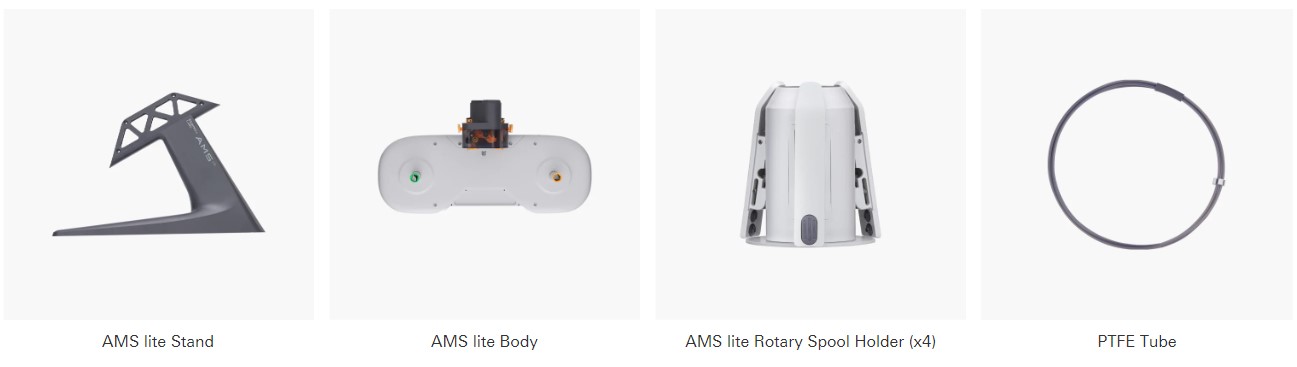
Na Caixa:
-1x AMS Lite Body
-1x AMS Lite Stand
- 4x AMS Lite Rotary Spool Holder
- Tubos PTFE
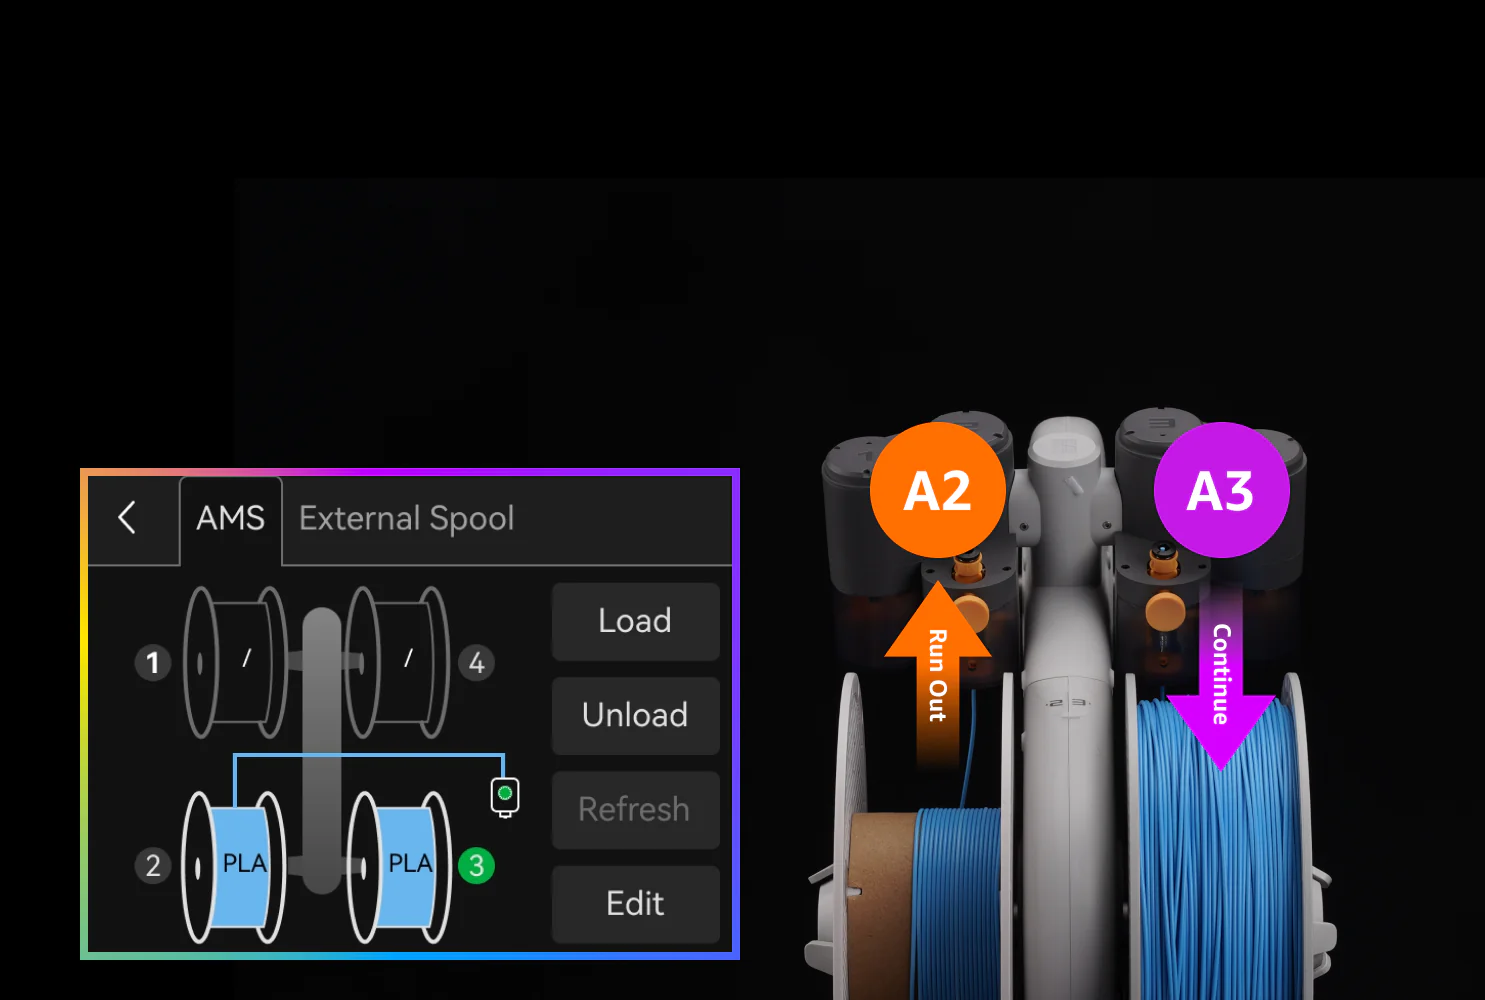
Como Utilizar:
* Aviso Importante:
Esta impressora 3D é considerada como um equipamento de desgaste rápido.
Este equipamento é comercializado em kit, sendo necessário conhecimento de montagem, manutenção e operação por parte do utilizador.
A manutenção regular e a substituição de peças desgastadas são essenciais para garantir o funcionamento eficiente e a longevidade da impressora 3D.
A compra deste produto requer conhecimento da língua inglesa, uma vez que as bases de dados, os termos técnicos e o software associado estão disponíveis exclusivamente em inglês.
Partilhamos os termos de garantia limitada e específica deste equipamento, onde poderá encontrar as peças de desgaste rápido (3 meses de garantia) e peças consideradas como consumíveis (sem garantia) :
https://bambulab.com/en/policies/warranty
A Evolt concede a garantia legal de 3 anos em todos os componentes que não sejam classificados como peças de desgaste ou consumíveis.
Qualquer necessidade de activação da garantia seguirá o processo de diagnóstico à distância realizado pela Evolt. Após validação e aprovação pelo fabricante Bambu Lab, as peças necessárias para a reparação serão enviadas, acompanhadas dos respectivos manuais de reparação. Em caso de necessidade a Evolt disponibiliza de serviços adicionais como formação e assistência profissional premium.
Em caso de dúvidas, sugerimos que contacte a nossa equipa em primeiro lugar.
Qualquer sinal de uso inviabiliza a possibilidade de devolução do equipamento.
Este produto é acompanhado por manuais e informações online disponibilizadas pelo fabricante: https://wiki.bambulab.com/en/home
Problemas relacionados com entupimentos ou quebras causadas por descuido ou ignorância por parte do utilizador durante o manuseamento do equipamento não estão cobertos pela garantia.
Qualquer manipulação ou substituição de peças por parte do utilizador sem autorização da nossa equipa anula a garantia. Este produto não inclui qualquer tipo de serviço de suporte/assistência técnica, manutenção ou formação sobre como operar o equipamento ou realizar impressões 3D.
Qualquer necessidade de serviços prestados pela nossa equipa terá um custo adicional por hora ou será orçamentada previamente.
Ao comprar, o cliente confirma que compreende e aceita estas condições.
É perfeitamente normal no mundo da impressão 3D os utilizadores encontrarem dificuldades, quer a nível profissional, quer como hobby. Esta probabilidade aumenta à medida que os projetos se tornam mais complexos e a documentação é menos abrangente.
É por isso que recomendamos aos utilizadores, independentemente da sua experiência, que se juntem a comunidades de entusiastas, como a Bambu Lab Portugal e Impressão 3D Portugal, onde podem partilhar os seus projetos, solicitar assistência e certamente encontrar outros utilizadores que partilham configurações semelhantes, que já enfrentaram dúvidas semelhantes e podem prestar auxílio.
Devido às dimensões e aos encargos logísticos envolvidos, não realizamos entregas em mão nem disponibilizamos recolha no nosso Pickup 24/7. Apenas disponibilizamos a opção de envio.